Saturday, March 31, 2012

Passover Salted Caramel Brownies


The full recipe is in my  PDF downloadable cookbook, Amazing Passover Desserts. 
Contract me to purchase at $5.00


If you'd like to see the ingredient list and what's involved before buying, read on.

You will truly amaze your guests with these rich and decadent bars.  What makes Passover caramel brownies challenging is that you'll need to make the caramel from scratch, rather than using caramel candies, and you can't use corn syrup, which helps to keep caramel from crystallizing.    For Passover, I've replaced corn syrup with honey and added a little lemon juice.  The lemon juice not only helps to cut the cloying sweetness of honey, but it also helps prevent crystallization.  Vanilla also helps to mellow the honey flavor and allow the caramel taste to come through.

 If you can find a 60% chocolate to use in these, you’ll have the richest flavor possible.  Nuts are definitely optional.

Dairy
MAKES 12-16 BARS

TIPS
Buy Passover extract at www.kosher.com or www.allinkosher.com .  Alternatively, scrape out the seeds from 1/3 of a Niellsen-Massey® vanilla bean, add to the sugar and continue with recipe.  Reserve the bean for another use, or packaged vanilla sugar can also be used.  Make sure to read the instructions on the sugar, as strength varies.

For chocolate chips, go to: www.choclat.com or www.ohnuts.com or www.allinkosher.com

Caramel Filling
water
mild honey (such as Clover)
granulated sugar
heavy cream
unsalted butter
Passover vanilla, vanilla bean or vanilla sugar (see above)
flaked or kosher salt, optional
lemon juice

Brownie Base
unsalted butter, cut into tablespoon-size chunks
60% Passover Chocolate chips AND Passover semisweet chocolate chips, divided  OR use all semisweet chocolate
granulated sugar
Passover vanilla extract (or water)
water

large eggs, room temperature
matzo cake meal
pecan or walnut pieces, optional

For the Caramel
        You’ll need a large pot to make the caramel, as it tends to foam and rise as it is cooking and when the cream is added.  I use a 5-quart, but a 4-quart would probably be fine, too.  Because you can’t use corn syrup for Passover, you’ll be using honey, which already has a brownish cast to it, so it will be very difficult to gauge the color if you use a non-stick pan.  A heavy-gauge stainless pot works best, reducing cooking time, and providing even heat to reduce burning.


    Off heat, place the water,  honey and lemon juice into  the pot, and stir gently to mix the ingredients together.  Very gently, begin to add in the sugar by pouring a little sugar into the center of the pot, and pushing the water mixture from the outside of the pan to the center.  You won’t be stirring, but pushing towards the center, as if you are on a clockface and pushing from each number towards the center.  Continue to add the sugar, and push until all of the sugar is moistened.

     Place the pot over medium-low heat, and continuing in the pushing manner, heat the mixture until it begins to simmer (keep the heat low, as you want the sugar to dissolve before it starts to actively simmer).

     Cover the pot, increase the heat to medium, and cook for 3-5 minutes.  The mixture should be bubbling and clearish – meaning that all of the sugar has dissolved.  Uncover the pot, raise the heat to medium-high, and continue to cook for 3-10 minutes WITHOUT STIRRING, until the mixture is medium amber in color (the time will depend on the pot you use and your cooktop).

         While the sugar is cooking, combine the cream and butter in a microwave-safe container, and microwave it for 30 seconds to heat it and melt the butter. 

            
      Before you stir in the cream, it is imperative that you wash off the spoon, so that when you stir in the cream, there aren’t any undissolved sugar crystals that get re-introduced, as these will make the caramel grainy (that’s why you’ve elaborately pushed the sugar, rather than stirring – to avoid sugar crystals clinging to the sides of the pan).  Once the sugar mixture is the color you want, tip the pain away from you, and add the cream mixture all at once. Stir in the salt.  Stir gently until the mixture is smooth and slightly thickened. 


      Pour the mixture into a Pyrex bowl or other heat-resistant container, and stir in the vanilla.  Set the mixture aside to cool and thicken.

For the Brownie
         PREHEAT THE OVEN TO 350 oF with a shelf in the middle of the oven.  Line an 8-inch square cake pan with two layers of aluminum foil, so that the whole inside of the pan is covered in foil.  Grease and sprinkle with matzo cake meal.


1.     Place the butter and the 1 cup of bittersweet chocolate (or 1 cup of semisweet chips if the other isn’t available) in a large microwavable container.  Microwave on power 5 (medium) for 2 minutes.  Stir to blend.  If the chips and butter are not melted, continue to heat in 30-second intervals on power 5, until everything is melted.  Stir well to mix the ingredients together. Whisk in the sugar, vanilla extract and the water.

2.     Whisk the eggs together and then whisk them to the chocolate mixture, constantly whisking until they are well mixed in.  Using a wooden spoon, whisk in the matzo cake meal, in six additions, until well blended. Spread about half of the batter into the prepared pan (this will be about 1-1/4 cups batter, and it should form a layer that is a little thicker than 1/8-inch thick).

3.     Sprinkle 1/3 cup of semisweet chocolate chips over the batter, and press them in so that none of them are exposed. Stir the remaining 1/3 cup chocolate chips into the reserved batter.

4.     Place the pan in the middle of the oven, and BAKE for 15-20 MINUTES until the top dulls and is no longer moist-looking.  Set the pan on a cooling rack.  Using the bottom of a wooden spoon, gently poke 16-20 holes in the brownie layer.  These will pool with caramel and will taste fabulous when the brownies are cooked.  Let the brownie cool for 15 minutes.

5.     If the caramel is too sticky, add 1 teaspoon cream to it, and microwave on high for 30 seconds.  It should now be spoonable.  If it isn’t add another ½ teaspoon cream, and microwave for 10 seconds (you want it thick enough so that it won’t run out of the brownie or down the sides of the top, but you don’t want it so sticky that it is unpleasant in the mouth).  Spoon all but 1/3 cup of caramel onto the brownie, paying attention to fill the holes.  You don’t need to go to the edges because these will be cut off.  Sprinkle the nuts over the caramel layer.   Let the caramel firm up for 15 minutes.

6.     Spoon on the remaining chocolate batter in “globs”, and then gently spread them together so that the brownie batter covers the caramel. Set the pan back in the oven, and bake for 15-20 minutes, until the top looks dullish and cooked.  Do not do a crumb test, as the caramel and melted chocolate chips will make it seem that the brownie isn’t cooked even when it is done.  It’s better to err on the side of underdone, as you can always refrigerate for a little while to firm the brownies up, but if they are overcooked they will taste dry and the matzo meal flavor will overtake the taste.

7.     Transfer the pan to a cooling rack.  Let the brownies cool completely, and then refrigerate for about 40 minutes – just enough to make them firm enough to cut, but not so much that the chocolate chips get hard.

8.     To cut the brownies, lift the whole thing out of the pan, using the aluminum foil to transfer it to a cutting board.  The brownies will be stuck to the sides of the foil.  Do not attempt to remove the foil, or the brownies will break apart.  Instead, cut off the outer quarter-inch of brownie from all sides.  Once this is done, you’ll be able to cut the brownies into bars.  They are very rich, so cut small squares.

To decorate like the opening photo, melt 1 ounce chocolate with 1 teaspoon oil.  Pour the mixture into a plastic bag, make a tiny hole in the tip, and drizzle on a decoration.  Repeat with caramel, if desired.

The brownies can also be decorated with just caramel and a sprinkling of flake (fleur de sel) or kosher salt (for true salted caramel lovers only).  If the reserved caramel has been refrigerated, microwave it for 10-20 seconds, just so that it will run, but is thick enough to pool on the brownies and not run down the sides too much.  Use about ¼ teaspoon total amount of salt.  For the flake salt, you might want to just crush it between your fingers before sprinkling a tiny bit on the top of each pool of caramel.


For brownies that are a bit more firm and fudgy, refrigerate the brownies for at least 2 hours, but remove them from the refrigerator at least 2 hours before serving.

MORE TIPS
The amount of cream isn’t exact because ingredients and equipment vary. If you add too little cream, the caramel will be sticky – like candy.  If too much, it will be runny and the brownies will be messy and hard to cut.  After you make them a few times with your own equipment and the kind of butter and cream you like, you’ll figure out exactly what to do.

How to cut the brownies:  Use a long, sturdy knife, and have a warm damp cloth and a towel nearby.  Saw through the top crust with a serrated knife and then press down and through the brownie.  After each cut, draw the knife out, rather than pulling it up, and wipe it with the damp cloth and then dry it before the next cut.  This technique will eliminate crumbs and mess from getting on the top of each brownie.

CAN PREPARE AHEAD 
Room temperature or Refrigerated – 2 days, Frozen – 3 months
      Serve at room temperature.


CONTACT ME FOR THE ENTIRE COLLECTION OF AMAZING PASSOVER DESSERTS
NOW FOR $5.00

Monday, December 19, 2011

Holiday Sugar Cookies


This perfect sugar cookie is easy to make, ready to roll quickly, is very firm so that the icing doesn't soften it, and tastes great.  I originally developed this dough as a service project for the children of our Temple who were going to provide cookies for 1000 needy children.  They are great as is, but also taste and look great when they are decorated with sprinkles or with icing. 


MAKES 50-80 COOKIES


 3 sticks (12 ounces) unsalted butter – cool room temperature
1-1/2 cups sugar

1 teaspoon salt
1 teaspoon vanilla
1 large egg, room temperature
4 cups ( 520 grams) all-purpose flour, fluffed, scooped and leveled into measuring cups 
up to 4 teaspoons room temperature water, if needed

Vanilla Cookie Icing
4 cups powdered sugar
2 teaspoons vanilla extract
10-15 tablespoons cream
OR
Royal Icing
Food coloring, sprinkles, etc for decorating


Preheat the oven to 350 degrees F. with shelves in the bottom and top thirds of the oven.  Line 2 cookie sheets with parchment paper.

In a large mixer bowl beat together the butter, sugar, salt and vanilla extract on low to medium speed, just until well blended. 

Break the egg into a small bowl and fork-whisk until blended.  Gradually beat the egg into the butter mixture. 

Add the flour, all at once, to the mixer bowl, and beat on low speed until the mixture comes together into a dough.  If the dough does not form, add the water a little at a time, using just enough to bring the dough together.  Press the dough into a ball, wrap in plastic, and refrigerate for 15 minutes.

Cut the dough into 4 pieces and return 3 pieces to the refrigerator.

Roll the dough to 1/8-inch thick or slightly thinner.  Cut out the dough using cookie cutters of your choice.  Set the cookies on the prepared cookie sheets.  Bake for a total of 13-15 minutes, moving the top cookie sheet to the lower shelf and the bottom sheet to the top after half of the baking time, until the cookies are nicely browned around the edges. 

Slide the parchment onto cooling racks.  Repeat the process using the rest of the dough.

buy dobord at:http://kitchenfriendly.com/

buy perfectapie ring at: www.fantes.com


For the icing:
Sift the powdered sugar into a mixer bowl.  Beat in the vanilla and enough cream to make the icing the texture that you desire, depending on how you will use it.  If it is to be piped you'll want it thick and if it is to be used as "fill", it will need to be thin. Divide the icing into several small bowls and add food coloring of choice to each bowl.  The icing thickens as it sits, so keep the bowl covered until ready to use.  Add a little more cream if the icing gets too thick. 

Here are some decorating examples:
The snowman's hat had some chocolate added to white icing.  It was spread on.  The white body icing  had the outline piped first.  It was allowed to set and then the interior was filled with thin icing that flowed to fill the space.  The scarf and belt were piped. The eyes are chocolate chips and the buttons are star-shaped sprinkles.


The design on this tree was piped on and while it was still wet, green sprinkles were sprinkled on and the excess shaken off.  The balls are tiny red ball-sprinkles, the bubble lights are long sprinkles and the star is a candy-sprinkle.  The garland was sprinkled with petal dust (ordered from www.sugarcraft.com).


For these Chanukah dreidles, the blue icing was spread on, and while wet, the cookies were sprinkled with blue sprinkles.  This dried and then the raised letters were piped on with thick icing. 


To make a harder icing for cookies that need to be stacked or frozen, use this icing
3 large pasteurized egg whites
3-3/4 cups sifted powdered sugar + 1/4 cup, divided
1/2 teaspoon cream of tartar
1/2 teaspoon flavoring of choice

Reserve 1/4 cup sugar and mix together all other ingredients.  Beat for 7-10 minutes until the icing holds a strong peak.  Add 1/4 cup more powdered sugar if necessary.  Keep the frosting covered with a damp cloth to keep it from drying out.  To use Royal Icing, outline the cookies and then let them dry.  Thin some icing with water until it is the consistency of heavy cream.  Using a teaspoon or squeeze bottle, fill in from the outline inward to cover the area.  Let the cookies set for 1 hour before adding designs.


The cookies may be stored in a covered container for several days.  They may also be frozen in a covered container, with waxed paper between layers. This way you'll be able to defrost each cookie individually.  They’ll keep frozen for 3 months.  Defrost at room temperature, uncovered, for several hours or overnight.  When the cookies are completely defrosted and at room temperature, they may be iced.


Wednesday, November 9, 2011

Thanksgiving Desserts

I usually make the same thing every year, although I might vary the apple dessert that I make.  It's part of our tradition that the pies are mostly the same, and it seems that this is what everyone wants.  So, rather than try and come up with something new,  I'm just going to make it easy for you to find the recipes in my blog.  Simply click on the name of the dessert to the recipe.


PUMPKIN PIE
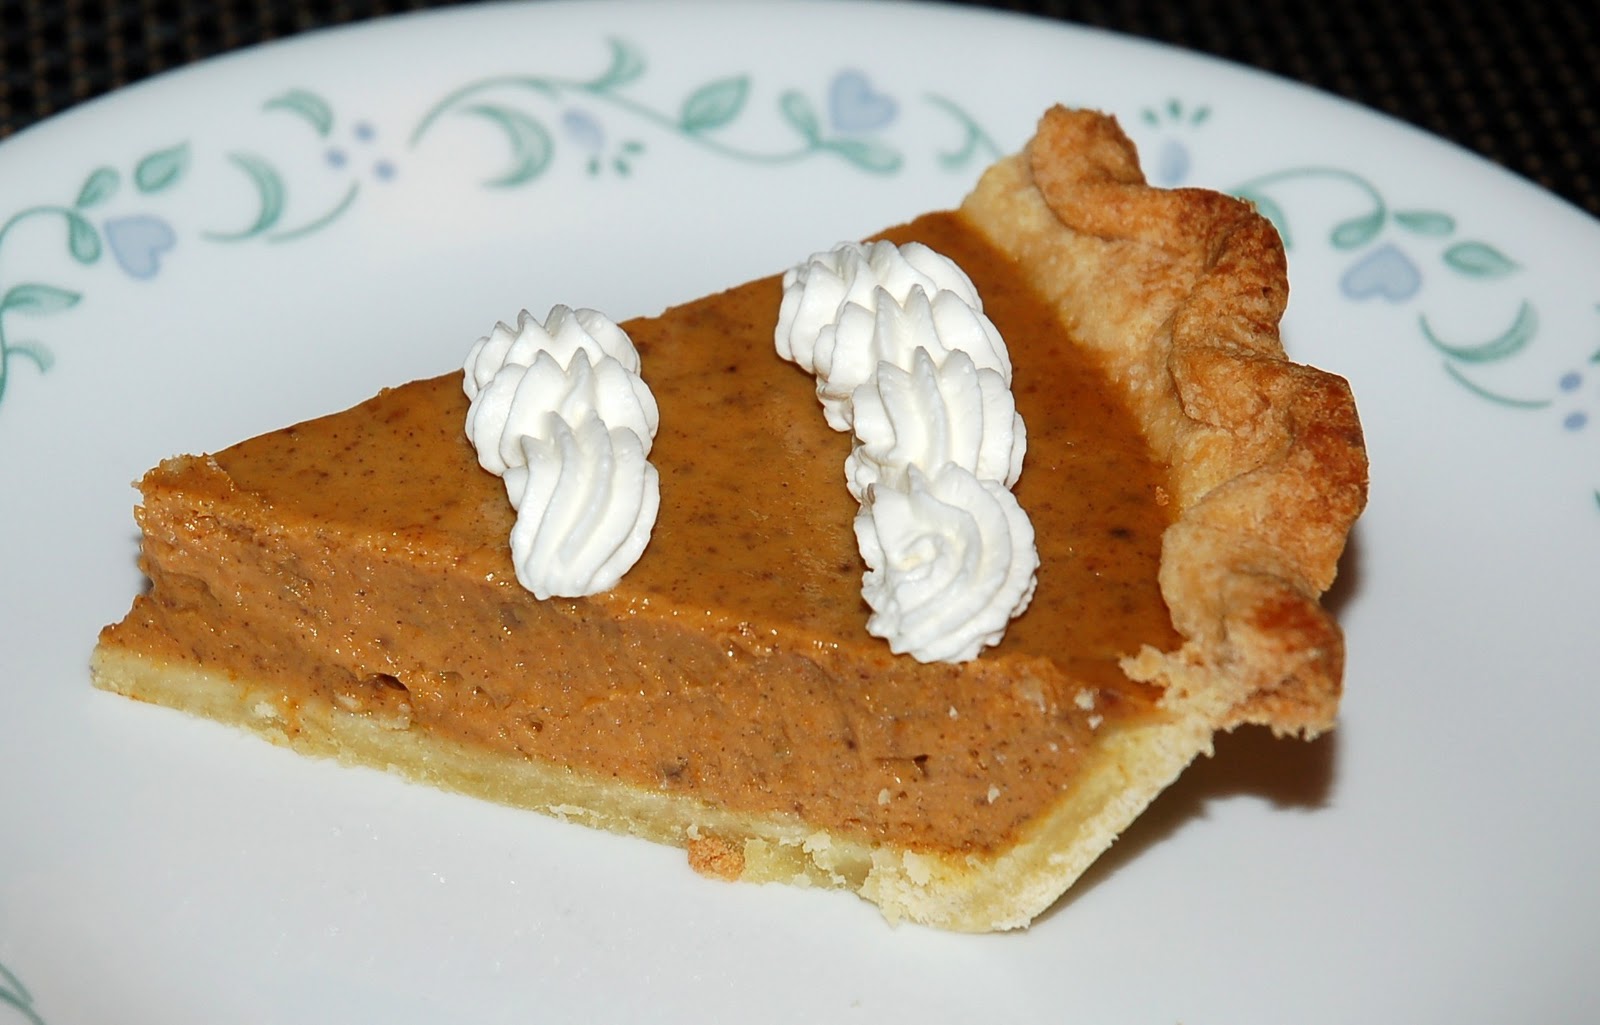
I always make pumpkin pie.  It's one of my husband's favorites and I've tweaked it to where it is just the way he likes it! It was also my father-in-law's favorite, and when I make it, everyone has warm memories of him. It's a little firmer than standard with a very rich, spicy flavor.


CARAMEL PECAN PIE
This is my favorite, so I usually make two at Thanksgiving - one to bring  to our friend's dinner, and one to keep at home just for the family.  It's a little different from Southern-style pecan pie. It doesn't have that gelatinous bottom, has more pecans and is richly flavored like caramel.


THE BEST APPLE PIE
Everyone seems to love apple pie, and this one is my favorite.  You can tweak it to get it exactly the way you like it.


PEAR CRANBERRY TART
My daughter-in-law loves tart desserts, so when they are in for Thanksgiving, I like to plan on having one dessert with cranberries or rhubarb.    This one looks beautiful, and cuts nicely into neat slices.  It seems to be liked by even those who don't really like cranberries.


HAPPY THANKSGIVING EVERYONE!!

Tuesday, July 19, 2011

Fresh Heirloom Tomato Sauce, and More Ways to Use Ricotta


I guess until summer ends I'll still be in my Italian phase.  I just can't resist those fabulous heirloom tomatoes and wonderful fresh herbs.  Here is my fresh tomato sauce served over stuffed shells (with my homemade ricotta, but a good packaged ricotta works fine, too), but I also also love it spooned over angel hair or other pasta.    At the end of the recipes, I'll also have some more ideas for using homemade (or not) ricotta and tomatoes.

When I say fresh tomato sauce, I'm not talking about spaghetti sauce - you know the long-cooked type that you find in a jar.  No, this is a barely cooked sauce that tastes like fresh tomatoes.  To start, I use heirloom tomatoes (the big purply ones) that I buy from the Specialty Farmer at Cedar Walk Farmer's Market.  If you've been reading my blog, you know that I love their produce and buy from them all the time.

My friend thought they looked "dicey" - all purply and cracked.  Yup.  They do.  It's because the Specialty Farmer leaves them on the vine until they're practically bursting,  and picks them just before coming to market.  Do not be fooled by the looks.  This results in the most flavorful tomatoes that I've ever eaten in this country.  Head over there if you live in Charlotte!  It's open on Tuesdays from 4-7.

Fresh Tomato Sauce
Serves 4
The first time I made this sauce, I cooked the tomatoes for 10 minutes, as I had seen in so many recipes.  But heirloom tomatoes, especially these cherokee purples should not be cooked that long, unless you want a very mushy, watery sauce.  By grating half of the tomatoes, and leaving half diced and not cooked, you end up with the most flavorful and best textured fresh sauce.

3 pounds heirloom tomatoes (preferably cherokee purples)
1/2 teaspoon salt, divided
1 teaspoon olive oil, or more to taste
garlic or diced shallots, optional
2 tablespoons white wine
1 teaspoon balsamic vinegar, or more to taste
2 tablespoons chopped fresh herbs (your choice - oregano, thyme, sage, lavender)
1 teaspoon sugar
2 tablespoons chopped fresh basil

Cut off a slice from the bottom of half of the tomatoes.  Use your fingers to pull out the seeds from the little pockets in the tomato.


Using a box grater on the coarse side, gently grate the tomatoes into a colander, set over a bowl.  Grate until you get to the cracked upper part of the tomato, and then discard the rest.


 The remaining tomatoes need to be skinned.   If the tomatoes are not very ripe, you'll want to make an X- cut in the bottom of the tomato.  Very ripe and cracked ones don't need to be cut.


Boil a pot of water and immerse a few tomatoes at a time for 10-15 seconds.  Immediately dip them in cold water to stop the cooking.  The skins will now peel off easily.


Cut off the craggy top of the tomato, remove the seeds and cut out any hard core, and then dice the tomatoes into 1/4-inch dice.  Add the chopped tomatoes to the grated ones in the colander.  If there are any hardish bits of tomato,  add these to the juice in the pot under the colander.  Sprinkle 1/4 teaspoon salt over the chopped tomatoes and let them drain for 15 minutes.  You'll now have a potful of chopped tomatoes and a rather large quantity of tomato juice.

If you like garlic or onions in your sauce, add the olive oil to a pot and saute the onions until soft, or the garlic for a minute (I never use either in this sauce).  If not using the garlic and onions, pour the juice and hard bits of tomato into the pot along with the olive oil, wine, vinegar and chopped mixed herbs.  Heat the juice on medium-high heat until simmering.  Cook until the juice is reduced and thickened to a puree-type thickness (a matter of taste as to how thick it should be, but when you add the chopped tomatoes the sauce is going to get thinner as the tomatoes lose some of their liquid), about 10-15 minutes.  Remove the pot from the heat and add the chopped tomatoes.  Stir in sugar and remaining salt.  Taste, and adjust the sugar, salt and vinegar to get the taste you like.  Stir in the chopped basil (or you can add the chopped basil directly to the pasta).  Use immediately over pasta.

For Stuffed Shells
Makes 16 shells

16 large pasta shells
2 cups homemade or Polly-o Full-Fat Ricotta
2 cups shredded mozzarella, divided
3/4 cup freshly grated Parmesan, or a mixture of Parmesan, Asiago and Romano
1 tablespoon chopped fresh herbs
1 large egg
salt and pepper to taste

Preheat the oven to 375 degrees F.  Line a baking dish with heavy-duty foil, and then place a sheet of nonstick foil in the bottom (NO Cleanup!).

Put a very large pot of water up to boil, mixing in 1 teaspoon of salt.
Add the pasta shells and cook for 1-2 minutes less than the box calls for.  Immediately rinse them in cold water to stop the cooking.  Sprinkle on a little oil to keep them from sticking.

While the shells are cooking, combine all of the filling, except for 1 cup of mozzarella cheese, in a bowl, and stir to mix well.

Spoon 1 well-rounded tablespoonful of filling into each shell.


When all of the shells have been filled, spoon on the sauce, and top with the remaining mozzarella.


You can leave the shells uncovered, or cover with foil and bake for 15-20 minutes, just until the filling is hot.  If the shells were covered, you might want to low-broil them briefly to slightly brown the cheese.  Watch carefully, however.  If you don't like any part of the pasta crusty, don't broil at all.

Tip
Fresh herbs are really hard to cut when they're wet.  I like to chop them first, then put them in a small strainer, wash them and then dump them onto a paper towel to dry thoroughly before adding to my dish.


Heirloom Tomato Sauce with Spaghetti and Mixed Italian Cheeses


Friday, July 1, 2011

Becca's Baby Shower Bear Cake


After making marshmallow fondant for my last baby shower event, I was excited to try covering a cake with fondant.  I had been hesitant before, because commercial fondant doesn't taste very good, but marshmallow fondant tastes pretty good and doesn't have a lot of artificial ingredients in it.  The second drawback came when I saw that fondant shouldn't be refrigerated.  That doesn't work for me, because I usually use buttercream made with egg whites and butter.  I decided to use Marshmallow Fluff instead of egg whites, but I wouldn't sacrifice the butter.  Somewhere along the road, I read that if the cake were kept at 45 degrees, the fondant would be okay.  Since I have a second refrigerator, it was easy to make that adjustment, and as you can see from the picture, the fondant came out beautifully.  The lettering is done with Wilton Sugar Sheets, and I didn't know how they would do refrigerated either, but they seemed to be fine as well.

I made the bear a week in advance to give it time to firm up so that I could easily move it to the cake.  It took an entire recipe of marshmallow fondant, and I added the green while the marshmallows were melted. This way I didn't have the arduous and messy task of kneading in the green.  (I needed some black and pink fondant, which came from the white batch that I made to cover the cake). Work on a piece of waxed paper, so that you can move the bear after it has been made.

Start with the legs.  They need to be fatter at the top (the hip/thigh part) and taper to the foot.  Just bend the bottom of this piece to make the foot, which you can perfect after the bear is assembled.

The legs are going to attached midway, or slightly farther back from the center of the body.


Once the legs are made, the body can be shaped.  It needs to be pear-shaped so that it comes down between the legs.  Make the body taller and thinner than it needs to be.  The head is going to weigh it down so that the finished bear will be shorter and fatter than you started. Attach the legs with a little water.


The arms get fashioned in the same manner as the legs with the top shoulder/bicep fatter than the hand.  If you have the arms too long, you can always pinch off some to get them right once you have the bear all assembled.

For the head, start with a round ball about 1/3 the size of the body.  Put a toothpick or stick of spaghetti into the body and then stick the round ball on.  Once you have the ball stuck onto the body, you'll be able to see if it is proportioned right.  If it isn't right, you get something that looks more like a pig, so just keep playing with it until it looks right.  The snout, nose and eyes, though will really start making it look like a bear.


Some directions for teddy bears have the snout be flat and oval, but mine just didn't look bearlike until I made the snout stick out and be more triangular.  Once you have it the shape you like, attach it with water.


Color a small bit of fondant with either dark brown or black coloring.  Make the nose a reverse triangle from the snout.  My bear has a substantial nose!  I think it could be smaller and still be very bearish.  The eyes, on the other hand, need to be pretty small to be right, and to me they seem to look best if they are touching the snout rather than farther up on the head.  The mouth is easiest made with an edible marker.

For the ears I flattened a very small ball of green fondant, and then made them slightly concave.  I used a fondant ball tool to make the indentation for the pink fondant.

To add the final touches. put on the pink foot pad with a small brown pad at the bottom.  For the toes use the edible marker.  The toes can either be on the pad like I did, or off the pad on the green part (these are the claws, so they can even be right at the edge of the green part of the foot).


To make the fur, use a small scissor to make tiny clips into the fondant, which will stick up and look like fur.  Lastly, score the head/snout area so that it looks like the head has been stitched.  I used a flat toothpick, but there is a fondant tool for this purpose, if you have one.

Slide the waxed paper and bear onto a cardboard round and set aside to dry for 5-7 days at least. Once the bear has dried out, you'll be able to lift him off of the paper and onto the blanket, or wherever else you like.

For the blocks:
The blocks came from a Wilton design, which you can find at http://www.wilton.com/idea/Baby-Block-Cake.  For the round cake, I had to proportion the blocks smaller, but you'll  have to adjust them to the size cake you make (mine was 12-inches).   To see if the proportions would work, I cut the blocks out of paper and laid them on an upside down cake pan.  Once I had the right size block, I printed out letters on my computer, testing out different fonts and sizes to get the one I liked best, and the size that looked good on the block size I had chosen.  After you do that, you can use the Wilton instructions for cutting out the Sugar Sheets and applying the sanding sugar.  A word of caution - you can't pipe and sprinkle all of the blocks with the sanding sugar, and then hope to transfer them to the cake.  If any of the piping gel has gone onto the back or off the sides of the block, the blocks will adhere to the surface you have them on.  Instead, cut out all of the blocks, attach the letters and only  apply the edge gel and sugar just before placing them on the cake.  To get the spacing nice, I put my little paper mockups on the cake, and then replaced each one with the Sugar Sheet block.  That way it was easy to see which block went where.

Making the blanket:


I used the blanket to hide the little cardboard round that the bear was on.  I was afraid that the bear might sink into the cake, so I put 3 straws into the cake (cut even to the top of the cake) to support him, and then the bear was on a 3-inch round cardboard that I found at Michael's Craft Store.


To get the correct size, I just kept adding strips to the blanket until it covered the cardboard.


To begin making the blanket, sprinkle a work surface with powdered sugar and roll a piece of fondant to  just thicker than 1/16-inch.  Cut out strips, about 1/8-inch wide.


Lay the strips horizontally, and  weave 1 strip through the others so that one horizontal is on top and one on bottom, alternating until the whole strip has been woven.


Fold back the strips that are underneath the vertical strip.


Place on another vertical strip, close to the first one.


Fold down the strips that were up, so you now have two strips that are woven.  Fold up the strips that are underneath, and repeat the whole process.  Move the strips close to each other after they are woven in.


When the blanket is the size you want, press down on it to mesh it all together nicely.

Cut the tails to an even length.  To make the fringe, make small cuts into the tails with a knife.  Slide the blanket onto a small round or square cardboard so that you can move it, and so that it provides a nice base for whatever will go on top of it.

For the cake I used the chocolate cake recipe from my wedding cake (http://amazingdessertrecipes.blogspot.com/2009/06/tales-of-tiered-cake-final-recipes.html) . I used a nail rose in the center of each to make sure that the cake cooked evenly in the middle (don't forget to remove it when you flip the cake out of the pan!).  It worked beautifully.  A center cone would also work, but then you have to put in a plug, so I prefer the nail method.  The frosting was an easy marshmallow meringue buttercream- see http://amazingdessertrecipes.blogspot.com/2010/02/valentines-day-layer-cake.html.  Leave out the cassis and use the powdered sugar and corn syrup sparingly, to taste.  Don't forget that you'll have the sweet fondant on the outside, so you don't want the frosting too sweet.  Some people won't eat the fondant, though, so it should be sweet enough.  You'll need a double recipe (3 pounds Marshmallow Fluff).


Thursday, May 5, 2011

Filled Fudge Cookies Revisited


I originally published this recipe in December 2010, and recently cooked them again, with a friend. Just for experience, she made them at her house before our baking session, and found that she had some difficulties with the dough.  I could tell immediately that she had overcooked the cookies, but when she described how dry her dough was, I knew that there was probably another problem.  We made them again, using the ingredients she had brought and found that the dough was way too dry.  The culprit seemed to be the flour.  The recipe called for unbleached flour, and that is what she had brought, but it was Gold Metal - Better For Bread, unbleached, and this flour has too much protein in it  for the dough to work (we know this because we made them again with Pillsbury unbleached and it worked fine).  I have changed the recipe to reflect this - it now calls for all-purpose flour - either unbleached or bleached will work fine, and will be less confusing to those who can only find unbleached bread flour.  The other issue was with the 1/2 can of condensed milk.  I, of course, did this by weight, using 7 ounces of the condensed milk - which actually turns out to be more than half of the can - even though the can says that it is 14 ounces.  The recipe now has a more precise measurement for this.  Lastly, we wanted the cookies to look more elegant so we drizzled them with dark and white chocolate.  I don't have a picture of the result, but they really looked wonderful.

This recipe is based upon a 1995 $50,000 Pillsbury Bake-off winner called Fudgy Bonbons.  It was a really good  confection, but not a great one, because the dough was kind of greasy and the filling bland.  The original recipe called for using chocolate chips, which got melted together with some butter and then mixed together with condensed milk and flour.  Because there was not a very large amount of butter, every time I made the cookies, the chocolate mixture seized - that is, it got stiff and grainy very quickly.  The quick fix to this was to melt the chocolate and butter separately, and then to combine the chocolate with the very large quantity of condensed milk, which worked beautifully (as long as the milk is at room temperature!).  I also thought that the dough would be smoother  and less greasy with less butter in it.  In addition to these problems, the original recipe called for using milk chocolate kisses in the center.  So here you had a rather sweet wrapping around a mediocre piece of chocolate candy, rather than having a contrast between the two and a superb chocolate candy center.  The last problem with the bon bons was that, although they tasted good the first day, after that the candy center hardened and then it was more like eating a wrapped candy, rather than a cookie.  All of these objections were easy to fix as you'll see in the following recipe.  In my opinion, I've turned a $50,000 bonbon into a $100,000 cookie!  Love to have your opinions!

Filled Fudge Cookies
7 ounces bittersweet chocolate, chopped ( I used Ghirardelli)
1 tablespoon unsalted butter
7 ounces (2/3cup) sweetened condensed milk, room temperature
1 teaspoon vanilla extract
1 cup (130 grams) all-purpose flour, measured by fluffing, scooping and levelling

30 Dove Promise candies, Caramel or Peanut Butter (or solid)

2 ounces semisweet chocolate, for decorating
2 ounces white chocolate, optional (to get it to melt thinly, you need  white chocolate with more than 31% cocoa butter (more than 15g/40g chocolate)

Preheat the oven to 350 degrees F. with a rack in the center of the oven.  Line a cookie sheet with parchment paper.

Place the chocolate in a large microwave-safe bowl, and heat it on medium power (5) for 1-1/2 minutes.  If the chocolate isn't yet melting, heat it for another 30 seconds.  Stir, and see if the mixture needs more heating or if it can rest and continue melting on its own.  Continue, heating, stirring and resting until the chocolate is melted and smooth.  Set aside to cool briefly.


Meanwhile, place the butter in a small microwave-safe bowl and heat it on 10 seconds to melt the butter.  Stir the condensed milk and vanilla into the chocolate and  then stir in the melted butter.


Add the flour and stir, and then knead the dough until all of the flour has been incorporated.

     
Keep the dough covered as you are making the cookies, and if it starts to crack a lot as you are making the cookies, drizzle  and knead in a little more condensed milk.

To make the cookies, pull off a small ball of dough, and flatten it in the palm of your hand or on a board until it is a scant 1/8-inch thick.  There are a few different shapes that you can make, and I use them to differentiate cookies that have different fillings.  This time, I used round shapes for cookies filled with solid chocolate ( I didn't like those for the reasons mentioned above), square shapes for the caramel filled cookies and triangles for the peanut butter filled cookies. 

For round or square shapes, set the Dove Promise square in the center of the dough you have just flattened, and then bring the sides up over the dough to encase the chocolate.


Once the dough is encased, you can squeeze and pat it in our hand and use your thumb and forefinger to shape the round.
 

For square shapes, tamp the cookie on its ends.


For triangles, I like to cut the Dove Promises in half.  If using the caramel filled ones, they will need to be frozen first.  I usually start with the same piece of dough as in the above examples, but I square it up on the work board and then turn it so that the pointed side is up.  I put the piece of candy in, wrap the top edges around the candy, estimate the amount of dough needed to finish the wrap, and then cut off the excess dough at the bottom. (When I try to cut it into the triangle shape first, I always seem to end up with too little dough, but you can do it anyway that gets the job done). 

The last thing to do is to seal the final edge, and I usually do that with a decorative rim.

Set the cookies on the prepared cookie sheet and bake them for 4-6 minutes.  DO NOT OVERBAKE. Cookies will be soft and appear shiny, but the bottoms will just be showing signs of being cooked and will look like barely-cooked brownies. Slide the parchment onto a cooling rack and let the cookies cool.  

The cookies aren't that attractive without some sort of decoration, and cookies that don't look great won't be perceived as great, even if they are! I usually just melt the 2 ounces of semisweet chocolate in a microwave-safe bowl for about 1 minute on power 5 or until melted.  I then make a little cone out of a plastic bag, snip off the tip and pipe some horizontal lines on the top to cover up the cookie blemishes. You can repeat the process with the white chocolate.
How long to let the cookies cool is definitely a matter of preference. After about 2 hours, the cookies will be cool, but the centers will still be totally liquid .  I prefer them after about 6 hours when the chocolate has firmed up a bit, but isn't yet hard.  By the next day, the centers will have firmed back to their original state.  You can put them back onto a cookie sheet and set them in a 100 or 200 degree oven for a minute or two to re-soften the centers slightly.

The cookies do freeze, although they are always much better when freshly made. Set the frozen cookies in a 300 degree oven for 5 minutes to defrost the dough and soften the centers.

Makes about 30 cookies