Sunday, May 31, 2009

Gooey Pecan Tassies – A Larger Pastry


My original tassie recipe was posted in February, and I said that you could also bake them in mini-cheesecake pans, but when I actually did that, there were so many changes that I made to the preparation and the ingredient quantities, that I decided to just do another post.
I like my tassies to taste a bit like pecan pie so I make them with double the amount of corn syrup. I also use a sweeter crust, which has more cream cheese in it than the typical tassie, a small bit of powdered sugar and a little vanilla to enhance the sweetness.

Both my original recipe and this once can now be found on my CD-rom or download: Amazing Desserts - A Photographic Guide to Better Baking.  To see order details, please click on MY Books, above.

Friday, May 22, 2009

Tales of a Tiered Cake – The Flowers Part 3

sugarpasterose_16
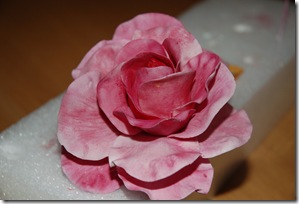
The photo I really want you to see is below, after this long paragraph. It’s below the paragraph, just in case my kids don’t want to see the finished rose. It’s been made for their double-engagement party which will take place at the end of June. So kids – read no farther if you don’t want to see the rose.
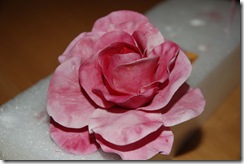
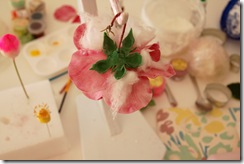
The finished rose that I described in the last post has some veining on the outer leaves which make them look so realistic. Also notice that the inner leaves are darker than the outer leaves. This happens to real roses as they fully open up. You can’t tell from the photo, but I didn’t do it exactly as I described – on the inner rows I forgot that the last petal in a row was supposed to be glued down on both sides. I also used the larger petal cutter for the last two rows, and turned the flower upside down for the last two rows so that the flower would be even more open and larger than I described last time (I actually didn’t do this on purpose, but just forgot exactly when to do these things). My point is, if you don’t do it exactly as described, it can still come out beautiful!
sugarpasterose_20
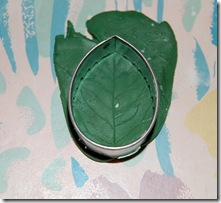
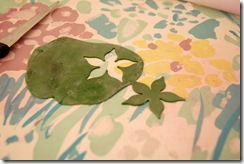
To make some rose leaves, you roll out some green dough, making it thicker at the bottom because this is where the wire is going to be inserted. Vein the leaf with a leaf veiner.sugarpasterose 042
and then cut out the leaf using whatever size is appropriate (not like the photo which has the leaf being cut first)
I like to do one large leaf in the middle, and then two smaller leaves – roses tend to have leaves clumped three together.
sugarpasterose 041
sugarpasterose 043
You can see the veining that I’ve done. Line the center vein up with the pointed tip and then cut the leaf. If you haven’t rolled the dough thin enough, you can roll it long, re-vein and then recut, or you can use the ball tool around the edges to thin them. I think the first option works better, because the ball tool will remove the veining and if the leaf is too thick to begin with, you’ll get a ridge from the unrolled edge to the center of the leaf.
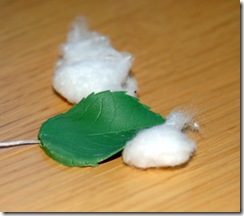
To attach wires to the leaves, use a very fine wire so that you can readily bend it. I’d like to use green, but I only have thin wire in white, so I’ll have to use petal dust to color it green (I have gauge 28 as my thinnest wire). Hold the petal between your thumb and index finger. With your other hand, dip the wire in egg white, wipe off excess and then slide the wire in about 1/4-inch using your fingers as guides to make sure that the wire is in the dough and not poking through. Place a thin-bladed knife in the center vein, and then fold the dough slightly to give the leaf some 3-d shape. You can give the leaf some more movement, and use cotton or batting to keep it from falling downward before it hardens.
sugarpasterose 047
I’ve decided not to photograph the bud – it’s exactly the same as the first steps of the rose, and then you put on the calyx, wrap the stem in tape and add a leaf. You’ll see the completed rose with leaves and bud on the finished cake.
I have one more rose to show you, and then there might be some more on the completed cake. The last rose is a long stemmed rose but I’ve only put on 4 rows of petals. I could have put on the 5th and not turned it upside down so that it would be more compact, but I liked the size and decided just to go ahead and leave it with the 4 rows.
sugarpasterose 049

Wednesday, May 20, 2009

Tales of a Tiered Cake #9 – The Flowers Part 2

sugarpasterose 012
Spoiler Alert!! Beth and Eric if you are reading my blog, the first flowers for your engagement cake are going to be shown. Do not read any farther if you want this to be a surprise.
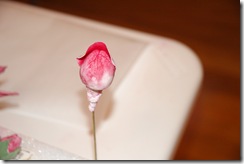
Continuing on from the last post, I’ve made the center bud (above photo) and dabbed on some petal dust. I’m ready to put some petals on my bud. I'm going to do 5 or 6 rows, using two petal cutters that are close in size to each other. Each row will have the number of petals of the row number - i.e. row 1 has 1 petal, row 2 has 2 petals, etc. On one side of my placemat, I’ll smear some crisco, and I’ll dab some cornstarch on the other half. On the side with the crisco, I’ll roll a little bit of sugarpaste out so thin that I can see the pattern of the place mat underneath. Then I lift up the sugarpaste and run it over the cornstarch on the other side. Leaving the sugarpaste on the cornstarch side, I can now cut out a petal with the the smaller of the two petal cutters.

sugarpasterose 015
The excess sugarpaste gets removed immediately and placed in plastic wrap or a baggy. When you have cut more than 1 petal, the petals you aren't working on need to be covered with plastic wrap so they don't dry out.

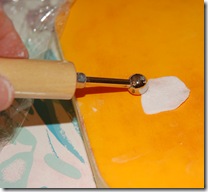
Flowers will look most realistic if the edges are super thin. To this, I’ll run around the outside edge of the petal with the ball tool.
sugarpasterose 016
It will be too hard to color the dough after it is shaped, so I’m going to color each petal before it is placed.
sugarpasterose 019
Now I’ll put a stripe of egg white on the left side, middle and right side of the petal, and secure it to the bud.
sugarpasterose 025a

(You can see that one side of the petal hasn't been pasted down yet).

For the 2nd row, you'll want to brush 1 side and the middle (not both sides)with egg white, because the second petal will get tucked under the first. The last petal of each row gets pasted on both sides. All other petals get pasted in the middle and one side only, so that the petals are overlapping.
sugarpasterose 026
The third row will have 3 petals and the 4th row will have 4 petals. Once you get to the 4th row you can ruffle the dough a little by pressing down harder with the ball tool, and you can add some veining if you like (press the dough into the veiner before cutting the petal). To make the 4th row less upright, you'll turn the petal over after it is ruffled, and then brush egg white only halfway up one side and the middle.
The 5th row will be made just like the fourth row. It needs to be much “looser” still, and the easiest way to have the petals arch backward is to put them on the flower upside down. Then you can hang it while you are preparing more petals, or if you are done, you can hang it until it is dry. Use cotton balls or batting to prevent the petals from sticking to each other, and to give the flower more shape.

sugarpasterose_11
Let the flower dry overnight and then you can turn it right side up.
sugarpasterose_20
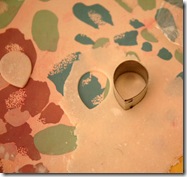
To make the calyx, color some dough with greenish brown food coloring. Roll the dough, as above and use a calyx cutter to cut out the dough.
sugarpasterose 032
Thin the edges of the dough with the ball tool, and then drag a needle tool from the tips to the center, to sharpen the point and to force the calyx tips to turn upward. Poke the rose wire through the center of the calyx, brush on a dab of egg white in the center of the calyx and push it up onto the bottom of the rose.

sugarpasterose 033

Use the needle tool to redefine the hip.


Tomorrow I will work on making a rose bud and some rose leaves.

Monday, May 18, 2009

Tales of a Tiered Cake #8 – Sugar paste Flowers

anns 50th 002
I made these sugar paste flowers last year for Ann Del Vecchio's birthday cake. They were my first attempt at making flowers, and I think they came out rather well. I used instructions from Scott Clark Wooley's book, Cakes by Design. I must say, though, that I wouldn't have been able to follow the directions in the book if I hadn't also bought his dvd of the same name. I have volume 1 of the dvd, which doesn't include this flower (alstroemeria), but the dvd gave me the understanding of how to roll, vein, cut, color etc. I used some real alstroemeria as models for the coloring that I used, rather than using the picture in Scott's book. These colors fit in with Ann's color scheme, but also the real flowers had such wonderful detail in them that I wanted to duplicate. Scott not only sells his books and dvds, he carries all of the supplies that you need to make these lifelike flowers and actually has a company that makes veiners and molds to his specs. He's a great resource for work like this, and I highly recommend buying his dvds, if you plan on attemping sugar work. If you want to make lifelike sugar paste flowers, it's not easy and it's not cheap. You need lots of equipment, lots of time, and lots of space to work in. But you'll get rave reviews if you are successful, that's for sure.
For my tiered engagement cake I think that I am going to make some roses. I want to try some traditional roses - instructions for these are on my Wooley dvd, and I might like to try making an open rose. I think the directions should be similar to a Gallica Rose, which is described in Wooley's book, or a wild rose (also in the book) but with more petals.
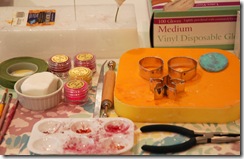
Here are the items I will need to make my rose:
wedding cake 015
A foam backed placemat
a small rolling pin (made especially for sugar paste or fondant)
Petal and leaf veiners
2 sizes of petal cutters (they're sold in sets)
20 gauge green wire
wire cutter/needle nose pliers
sugar paste
cornstarch
medium ball tool (I highly recommend Wooley's tool)
tweezers
calyx cutters
green tape
brushes ( you need lots of these)
crisco
gloves (optional)
petal dust - at least 4-5 colors including green, yellow and 3 shades of red/pink
food coloring
styrofoam blocks
egg white
cotton or batting
a palatte pan for mixing colors
You can see why I mentioned that this is not a cheap endeavor!
To begin my rose, I'm using Satin Ice brand sugar paste. It comes in a large tub that you can buy at cake decorating stores and sites. I also made some of my own sugar paste using a recipe from Nicholas Lodge (you can Google that), another great sugar artist. I used that recipe rather than Wooley's because I was able to get Tylose powder locally, but not Gum Tragacanth, which is used in Wooley's recipe. I thought it might be nice to compare the paste that I buy compared to the one I make. I had tried some sugar paste from Wilton, but I didn't think it worked very well.
For the first rose that I make, I'm not going to color the dough. This way I'll be able to color the base of each petal with a little yellow, and leave some of the white showing through. This is how the roses in my back yard looks.

sugarpasterose 008
I need to form the center bud and put it on a wire so that I'll have something to hang onto and something to push into a piece of styrofoam for drying.
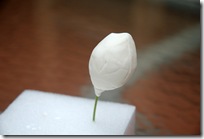
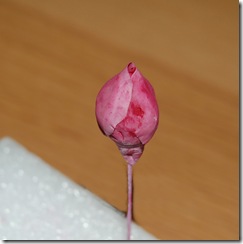
The bud needs to be the same height as the smallest cutter that I’m using. Here are my first 2 buds.
sugarpasterose 003
sugarpasterose 004
Well, the one on the left looks very long and the one on the bottom is very fat. I don’t know if they'll will work at all! I’ve made a little hip at the bottom, but I’m not sure if it’s big enough – I guess I’ll find out after I start wrapping the leaves around. The bud needs to dry overnight before I start adding the petals. Stay tuned!

Monday, May 11, 2009

Tales of a Tiered Cake #7 – The Yellow Cake tiers


To re-cap, my tiered cake will have a 12-inch base tier made from chocolate cake, with a sweet and tart cherry filling and kirsch buttercream. The upper two tiers will be vanilla cake with the same filling and frosting. As with all of the prior posts in this series, the recipes are working copies, and should not be relied upon. The final post will include the exact recipes. With a 5-quart mixer, you’ll be able to make the batter for the two upper tiers in one batch, but it will also help if you have two ovens or one convection oven, otherwise you would have to move the cakes halfway through baking, and this is not recommended.
Yellow Cake for 9 and 6-inch Tiers4 cups all-purpose flour, measured by fluffing, scooping and leveling
1-1/2 tablespoons baking powder
3/4 teaspoon salt
3 sticks (12 ounces) unsalted butter
3 cups sugar
1 tablespoon vanilla
6 large eggs
1-1/2 cups whole milk

Preheat the ovens to 350 degrees Fahrenheit (325 convection) with a rack in the middle of the oven or upper and lower thirds if using convection. Spray-grease two 9x2-inch round cake pans and two 6x2-inch round cake pans. Line the bottom of the pans with parchment paper, spray-grease the entire pan, and then flour all of the pans.
While the ovens are pre-heating, bring the butter to room temperature, by cutting it into tablespoon-size lumps. Measure out the milk and let it warm up to room temperature. About 5 minutes before starting the recipe, place the eggs (in the shell) into a bowl of warm water to bring them to room temperature.
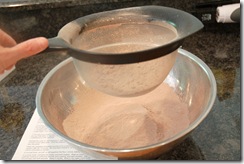
Sift together the flour, baking powder and salt.
Place the butter and sugar into a large mixer bowl, and beat for a full 5-7 minutes until fluffy. Beat in the vanilla and then the eggs, one at a time, adding them as each is incorporated into the batter. Scrape down the bowl and then beat for a minute to blend everything.
The tricky part comes when you have to add the milk and the flour, alternately into the batter. You start with about 1/4 of the flour, and beat it into the batter on low. Then, by tablespoonful, you want to beat in about 1/3 of the milk. If you add the milk too fast, or it’s not at the right temperature, the batter “breaks”, meaning that it starts to look curdled. Usually, when you add more flour, the batter smoothes out . Continue alternating until all of the milk and the last bit of flour has been incorporated. If the batter is curdled at this point, your final cake is going to be greasy. That’s why it’s so important that the ingredients be at the proper temperature. And make sure that you add the milk slowly, beating in a tablespoon at a time until well mixed before adding more milk.
Divide the batter evenly among all of the pans (I do this by weight, but you can stick a skewer into the batter and make sure that each pan has the same depth).
wedding cake info 088

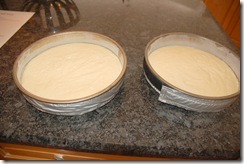
You can see that I've used magic cake strips on the sides of the pans to help the cakes rise evenly without mounding in the center. The strips get dipped in cold water, squeezed and then wrapped around the pans. Mine are secured with Velcro.
I wish I had seen this set on Amazon before I baked the chocolate layers - maybe they wouldn't have mounded as much. My strips were too small for the 12-inch pans.


Place the pans in the oven and bake the larger pans for 30-40 minutes and the smaller pans for 20-30 minutes, until a tester inserted into the middle of the cakes comes out clean.
Problems:
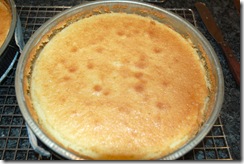
#1 I can see that I really needed more batter. My tiers need to be all the same height, and this layer will not be a scant 1-1/2-inches – especially if it’s not perfectly flat and needs trimming. I’m going to have to remake the cakes using 7 eggs, instead of 6.
wedding cake info 090
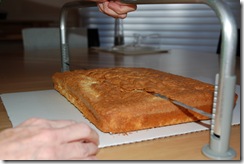
Since I’m not going to be using this layer, I thought I would cut it to see how it tastes, etc. While it tested done – no crumbs stuck to the skewer, I noticed that it wasn’t quite springy to the touch. As I suspected it really could have been cooked a little bit longer. On the next batch I’ll try to cook it until just springy.
Problem #2 - This cake was baked in my lower oven, but it came out much browner than the one baked in my top oven. Because it was browning so much faster, I had to cut back on the temperature midway through baking. I think it will be fine, and the top browned crust will get cut off anyway.
wedding cake info brown
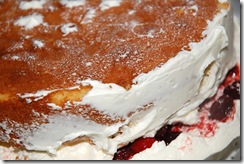
Assembling the layers: I froze the top layer to make it easier to handle, and it was a good thing that I did. Unfortunately, I didn’t notice until I had assembled the tier with frosting and cherries, that the top layer had a deep gouge in it. Because the top layer was partially frozen, I was able to lift it off with a super-sized spatula.
spatula-super
The only problem in doing this, was that Iwasn’t able to get the cherries sufficiently tucked off of the edge of the cake. I then had to go back and poke all of the cherries inward and apply some frosting to the indentation so that they won’t be peeking through the outside frosting. It worked out fine, thankfully, and the remaining two tiers were made and frozen.
wedding cake info 100
Here are the challenges that will face me when I defrost the tiers:
Will the cakes “weep” when they get defrosted, leaving some water on the tops of the cakes, and if so, how will I get it off without marring the surface?
I’ll need to apply the final buttercream trim after the tiers are in place, or I’ll probably damage the trim. Since I don’t want to be messing with buttercream just before the party starts, I’ll have to put together two of the tiers either earlier that day, or the day before. Since I’ve made the supports slightly higher than the cake so that the frosting won’t get smooshed, will I be able to move the cake to the refrigerator and then back to the table on which it will sit? Or should I shorten the supports after the cake defrosts and not worry about the frosting?
Next job will be to make some sugarpaste flowers…

Thursday, May 7, 2009

Tales of a Tiered Cake #6 – Assembling the Tiers

wedding cake info 074
This is my 6th post in this series chronicling my efforts to make a tiered engagement cake for the double engagement of my children. To see the other posts, search my blog for Tales of a Tiered Cake.
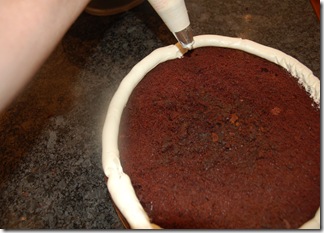
To begin my chocolate tier, I have one 12-inch layer frozen. The bottom layer is on a 12-cake board. The cake has shrunk a little from cooking so the board is slightly larger than the cake. This will actually make icing the cake a little easier as it will provide a guide for putting on an even layer of buttercream. I’ve piped a ring of buttercream around the cake using a 1/2-inch tube. This is so that the cherry filling will not ooze out the sides or poke through the side frosting.
Next, I’m going to spoon on an even layer of cherries, using about 4 cups of cherry filling. We did a little taste test with a crumb of cake, filling and buttercream, and have decided that we liked the two fillings mixed together – so that would be the canned cherry filling and the frozen cherry filling combined. I’m thinking that I’ll redo that recipe to include both kinds of cherries, and since the canned cherries are already gooey, there’ll be no need for cornstarch in the final recipe.
wedding cake info 098
On top of the cherries, I’ll spread an even layer of chocolate buttercream, just so that the cherries are covered. Next the frozen cake layer gets placed on top, with the bottom of the cake facing up. This will give me a nice smooth surface on which to place the frosting. The cake is now placed on my decorating turntable for icing.
wedding cake info 075
The next step is to crumb-coat the whole cake with a thin layer of frosting. This is to trap in crumbs, smooth out holes, and provide a nice base-coat for the final layer of buttercream. The crumb coat does not have to be perfectly smooth. After crumb-coating, place the cake in the refrigerator until the frosting is firm.
wedding cake info 077
For the top coat of buttercream, I like to start on the sides, then do the top, and then finish the sides again. Other decorators start with the top. Spread the frosting on with a decorating spatula, using the size you are comfortable with. I use mostly a 7-inch, and a 14-inch for the top.
tools 023
When you get close to having the final coat, the spatula can be heated in hot water and then glided over the frosting. This will melt it slightly, making for a smoother coat. Honestly, I have trouble making smooth frosting. Most of the top will be covered by the next tier and the outer edge will have a frosting border, so I haven’t spent that much time on it. The sides are right out there, and I can’t seem to get them perfectly smooth.
wedding cake info 078
If this were a regular party or occasion cake, I would pat on some nuts or chocolate shavings, but I don’t think that will look great with this cake, so I’m going to use a cake decorating comb to put a nice design into the sides. Because I’ve used the bottom cake board as an icing guide, I know I’ll have enough frosting to use the comb without the cake showing through.
wedding cake info 079
The cake gets refrigerated until the buttercream is firm. Once the cake is cold, I’ll be able to smooth out the little “nubs” you see in the design made by the comb. The warmth of my finger will be enough to smooth those down.
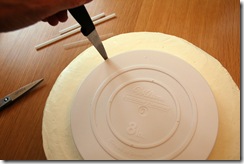
I’m ready to insert my supports for the next tier. I’m going to freeze the cake with the plastic supports in the cake. There will be some cake in the straws which will act as extra support for the tier above. I use straws instead of dowels because they’re easier to cut. First I have to mark where the 9-inch tier will rest and then I’ll put supports closer to the center than the marks to make sure that the supports are totally under the next cake tier.
I have an 8-inch plastic separator plate that I’ll be using to mark the cake. It has little feet on the bottom raising it off of the surface of the cake. I’ll just make a few marks that will help me center the next tier.

wedding cake info 081
Now that I see where the next tier will go, I can see that I didn't do a good enough job smoothing out the top. I'm hoping that the border decoration will hide most of the flaws. If I have a really bad spot, I guess I'll have to put a flower there!
wedding cake info 082
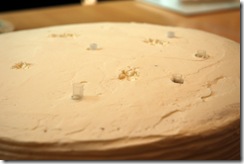
My goal was to cut the straws just slightly taller than the cake. You can see that although I cut the straws to all the same length they’re sticking out of the cake differently. It’s clear that although my cake looked pretty level, it is not. I’ll mark the straws with a pencil (while still in the cake), remove them with needlenose pliers that I bought specifically for cooking and place them back into the cake. All of the straws need to be cut because I only want them to be 1/16th-inch taller than the cake. Most decorators make the supports the same height as the cake, but I’m concerned that when the tier gets removed, the frosting will all come off, too.
I’ve asked tons of decorator’s what they do about frosting sticking to the to the tier above, and the most common answer I get is that they don’t care! But I do care. I want those who eat my cakes (whether they are friends or clients) to enjoy them completely, and that means that there must be frosting on the top of the cake. Rose Levy Beranbaum, on of my all-time favorite authors suggests that I cut the straws just a hair taller than the cake. The only problem with this method is that it would be tricky to move the cake without the layer moving slightly. Since I won’t have to move this cake once it is assembled, I’m going to use that method. But just to test out other methods, for the tier above, I’m going to try cutting the supports to the height of the cake, set a piece of parchment on the frosting and then set my tier on top of that. That seems to be a method that a lot of decorators use. I’ll have extra buttercream on hand, just in case the parchment lifts too much of the frosting off. And then I’ll be able to report back about this common method.
The next step will be to make the next two tiers, which will be the same except that I’ll be making a vanilla cake instead of chocolate.

Wednesday, May 6, 2009

Tales of a Tiered Cake #5 – The Frosting

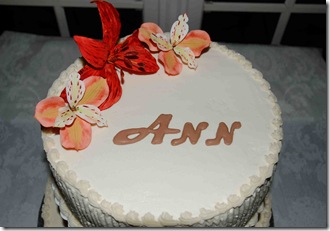
anns 50th 1.5
For those of you who are just joining this blog, I’m posting a series that has been chronicling my adventures in making a tiered cake for the engagement party of my children. The recipes are a work in progress, so check back for the updated and corrected recipes.
The cake shown above is the top of the tiered cake that I made for a birthday party, but the frosting is basically the same as the one I’ll be using for my engagement cake. Ann’s was flavored with cassis to go with a raspberry filling. For this cake, I’ll use kirsch to go with the cherry filling. I’m going to be using a simplified meringue buttercream. It’s quite different from bakery frosting in that it’s much less sweet and has none of the grit associated with frostings made with powdered sugar. Making buttercream can be very difficult, because in the traditional version, you have to cook a sugar syrup to softball stage and then get it into the beaten eggs or whites without any of it getting on the beaters or bowl, where it will form hard sugar lumps or threads. This simplified method can be made in half the time, with half the skill. It might contain a few sugar crystals, but they won’t be noticed when eaten with the cake. I use pasteurized egg whites that come in a carton. They should contain nothing but pure egg whites. You can separate out egg whites if you prefer. Just make sure that not a single drop of egg yolk gets into the egg whites. You can also use regular egg whites, but you’ll have to cook them differently to make sure that all bacteria gets killed (directions will be inlcuded in the final, corrected recipe posts). As with any recipe containing stiffly beaten egg whites, all utensils and tools must be completely grease-free. Wash them thoroughly and for extra measure, you can wipe out with a towel moistened with vinegar (rinse and dry afterwards).
Kirsch Meringue Buttercream240 grams (8 large) pasteurized egg whites -- (I use Organic Valley Egg Whites, in a carton)
3 tablespoons water
2 –2/3 cups superfine sugar (or you can buzz it in a coffee grinder)
21 ounces unsalted butter
3/4 teaspoon vanilla
1/3 cup kirsch
Remove the butter from the refrigerator and cut it into tablespoon-size lumps so it can soften while you prepare the eggs.
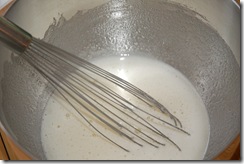
Boil 2 inches of water in a pot into which your metal mixer bowl will fit. Place the egg whites into the clean, grease-free mixer bowl. Whisk in the water and sugar.
wedding cake info 019
Place the bowl over the simmering water, and whisk –stir constantly until the mixture reaches 120-130 degrees, about 1-3 minutes. The mixture will be very warm, and the sugar granules should have dissolved. Remove the bowl from over the water. If you see any un-dissolved sugar crystals in the bowl, wipe these off with a paper towel.
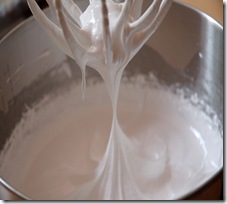
Beat the egg white mixture , increasing the speed to medium-high to high speed , as quickly as possible without having the egg whites splash out of the bowl. Beat until the mixture looks like thick shaving cream, and the egg whites and bowl are cool - about 20 minutes.
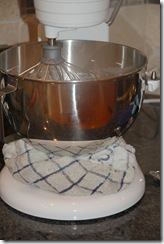
This is easiest done with a standing mixer using a balloon whisk. To hasten the process, wet a towel and place a few cupfuls of ice chips into it. Wrap it up and place this under the bowl so that it in constant contact with the bowl.
wedding cake info 022
wedding cake info 048

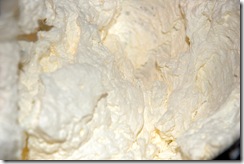
By now the butter should be at cool room temperature. If you press down on it with your thumb, it should yield readily, but should not be soft and melty. If too soft, refrigerate it just for a few minutes to firm it back up. Place the butter into a large mixing bowl, and beat until creamy. On low, beat in 1/3 of the whites. Repeat with the remaining whites, 2 more times. When all of the whites have been added, increase the beater speed to medium-high, and beat until the mixture curdles,
wedding cake info 028
and then smoothes out into thick and creamy frosting, about 10-15 minutes. Beat in the extract and liqueur .
wedding cake info 031
Buttercream can be made ahead and refrigerated, although it is easier to work with when fresh. Chop up the cold buttercream so that it will come to cool room temperature faster. Beat the room temperature buttercream as above, until creamy and smooth.
VARIATION
For the light chocolate buttercream between the 12-inch layers, use the following:
1/2 recipe of kirsch buttercream
3 ounces semisweet chocolate
2 tablespoons hot water
1 tablespoon unsalted butter
Microwave the chocolate, water and butter on medium power (5) until the chocolate is melted, about 30 seconds. Let the mixture cool, and then stir it into the buttercream.
To frost and assemble the 12-inch tier you'll need 2 recipes of the kirsch buttercream.

Sunday, May 3, 2009

Tales of a Tiered Cake #4 – The Cake

This picture is of me with the second tiered cake I had ever made. You can see that it uses pillars, like my first cake. It was made for a birthday party for my dear friend Ann Del Vecchio. Since I don't have any nice photos of the cake in progress, I thought this would capture the mood...

This is an ongoing series of posts about my adventure with making a tiered cake for an engagement party for both of my kids. It’s a work in progress, so please do not rely on these recipes until the end, when I will re-post the corrected recipes.
Now that the cherries are marinating, I’m going to make the 12-inch chocolate tier. Depending on my time schedule I’ll either freeze it for a short time and then assemble the cake, or make them on the day before assembly and then freeze the assembled cake. Unless you have a large standing freezer, you won’t have the option of freezing the assembled cake, as it takes up a lot of room. D0n’t forget to also check the size of your refrigerator. It has to accomodate at least a 14-inch round cake board and height clearance of at least 7-inches. If you can’t fit all three cakes in your refrigerator, you might think twice about making a tiered cake, or at least you’ll have to arrange for space elsewhere.
For the cake I’ll be using the recipe from my previously posted Chocolate Blackout cake. For a 12-inch round I can’t do much more than 1 recipe in my 5-quart mixer, so I’ll have to make the recipe twice. For 1 recipe I’ll scale it to 3 eggs and for 1 recipe I’ll scale it to 4 eggs to see which will work better.
Chocolate Wedding Cake 12-inch tier


7 ounces semisweet chocolate, chopped
3 tablespoons oil

2-3/4 cups + 2 tablespoons (244 grams) all-purpose flour, measured by fluffing, scooping and leveling
1/4 cup + 2 tablespoons unsweetened cocoa powder
2-1/4 teaspoons baking soda
1/4 teaspoon salt

16 tablespoons (8 ounces) unsalted butter, cut into tablespoons and at room temperature
3/4 cup light brown sugar
1-1/2 cups sugar

1-1/2 teaspoon vanilla
3 large eggs, room temperature
1-1/8 cups sour cream, room temperature
1 cup milk (skim or regular), room temperature

For the 4-egg recipe
10 ounces semisweet chocolate, chopped
4 tablespoons oil

3-3/4 cup + 2 tablespoons (488 grams) all-purpose flour, measured by fluffing, scooping and leveling
1/2 cup unsweetened cocoa powder
3 teaspoons baking soda
1/2 teaspoon salt

20 tablespoons (10 ounces) unsalted butter, cut into tablespoons and at room temperature
1 cup light brown sugar
2 cups sugar

2 teaspoon vanilla
4 large eggs, room temperature
1-1/2 cups sour cream, room temperature
1-1/4 cups milk (skim or regular), room temperature

Follow these instructions for either of the above set of ingredients, and then repeat for the second layer:

Preheat the oven to 350 degrees F. with an oven rack in the middle of the oven. Grease a 12-inch x 3-inch round cake pan. Line the bottom with parchment paper and then spray-grease and flour the pan

Place the chopped chocolate and the oil in a microwave-safe container. Micro-cook on medium (#5) for 1 minute. Stir and then reheat in 15-second increments on medium power until the chocolate is melted.

In a small bowl sift together the flour, cocoa, baking soda and salt. Set it aside.

wedding cake info 014

In a mixer bowl, combine the butter and both sugars. Beat on medium speed for 3-5 minutes until the mixture is uniformly smooth and creamy, and well aerated. Beat in vanilla. Add the eggs, beating for 1 minute after the addition of each egg, and scraping down the bowl a few times. On low, beat in the sour cream and chocolate. On low, in 4 additions, beat in the flour mixture alternately with the milk, starting and ending with the flour.
wedding cake info 016
Spoon the batter into the pan.
Bake for 60-70 minutes until a tester comes out clean. Set the cakes on a wire rack. Immediately, run a knife around the edges of the cakes, using an up-and-down, rather than a sawing motion. Cool completely. Invert the cooled pans onto a board, and rap the pans sharply to get the cakes out of the pans. Remove the parchment, and re-invert the cake so that they are right-side-up. Trim the cakes to get them level or to reduce them to the thickness you desire. You can use a cake saw (I like Wilton's), or a long serrated knife.
amazing desserts10 017
(My photos of the chocolate cake I just made have disappeared!) You’ll get to see the cake when I assemble the tier.
Results: The 3-egg tier made enough for a 1-7/16-inch (scant 1-1/2) layer with 1/16 to 1/8-inch being trimmed. It's pretty hard to trim just 1/16, so I think the 3-egg recipe would be better for a 1-1/4-inch layer. The 4-egg tier was almost 2-inches high, so it worked very well for a 1-1/2-inch layer. Because I don't want to throw away the 3-egg layer, I'll cut both layers to a scant 1-1/2 inches.
I’m going to freeze these cakes, and then I’ll make the frostings and assemble the cake when next I have a long day free. To freeze the cake, use a double layer of heavy-duty, long foil. Make sure that instead of just overlapping the ends, you roll up the foil, so that air won’t get in. When done, you can put the whole thing in a zip-top bag and then pop it into the freezer.

wedding cake info 061
Problems: The cake was a little underdone in the center, but very well done at the outer edges. I know this from trimming the top off of the cake. I won’t know until we actually eat the cake whether it was too fudgy, or whether the fudginess tastes good. I could have used a baking cone in the center (available from http://www.wilton.com/). You put the cone in the center of the pan, fill it with batter, and then fill the rest of the pan with batter. The batter in the cone and the batter in the pan should be at the same level. After the two are done baking, you pop the cake out of the cone and set it in the center of the cake. I was a bit nervous about having a separate piece in the middle of the cake, but it might have given me a more evenly baked cake.

Friday, May 1, 2009

Tales of a Tiered Cake #3 – Mistake #1


First, I want to reiterate that this series of posts is a work in progress. Recipes should not be used until I finalize and repost the corrected recipes.
So, now I’ll tell you about my first disaster. The marinated cherry filling for my cake requires at least two days and up to 2 weeks to marinate. It's been sitting in my refrigerator waiting for me to have a few consecutive days where I can assembly one of my tiers, and the time finally arrived. My husband and I had tasted the filling and decided that it tasted better if the cherries were chopped a little. I had done these in the processor and they tasted great. I dumped 2 pounds of the drained, marinated cherries into the processor and pulse - processed it in 10 short pulses. What came out was a mush of finely mashed berries - not very pleasant on the tongue. I should have taken a picture, but I was too downhearted to even think about it. Now I have to start over and wait another 2-14 days. This time I’m using half the recipe (enough for the large tier or the two smaller). I thought that maybe I'd like the cherries a little tarter so I reduced the sugar by 1/4 cup. I won’t know until it’s fully marinated whether I’ll like this better. I also cut the cherries into thirds so I won’t have to put them into the processor at all.

In addition, I thought that using tart cherries, instead of the sweet frozen ones, might also be tastier. The tiered golf cake, on the first post of this series, had just such a filling in it, and I don’t know if it is just my memory, but I thought that filling was nicer. We don’t get fresh tart cherries in North Carolina and it’s even hard to find canned ones, but cherry pie filling is easy to get. In that filling I used lime juice, but I opted to use orange juice again, and added dried cherries for a bit more chew.

Here’s the recipe for either the 12-inch tier, or the 9 and 6-inch tiers together:
Tart Cherry Filling4 (21 ounce) cans cherry pie filling
1/4 cup Manischewitz™ Blackberry wine
1/4 orange juice
1/4 teaspoon cinnamon
6 ounces bag (about 1 cup) dried cherries


Drain the cherries in a colander, over a bowl, until the cherries still have enough “goo” clinging to them so they are moist and clinging together (you’ll have reduced the weight by half, if you have a scale). Transfer the cherries to a large storage container.
Combine 1 cup of the “goo” with the wine, orange juice and cinnamon in a medium pot. Heat until steaming, remove from the heat, and stir in the dried cherries. Let the cherries steep for 15 minutes, stir them into the drained cherries, cover and refrigerate for a day or two.
I now have enough cherries marinating for the entire tiered cake. Maybe if both batches are good, I’ll use one batch for the chocolate tier and the other for the vanilla tiers!