Sunday, December 30, 2012

Apple Blackberry Galettes

If you're a regular visitor to my site, by now you've realized that I haven't published for a very long time.   We just moved to a downsized home AND I had double knee surgery.  It definitely has given me time to think about what I'd like to do.  And, I will probably RETIRE!!  I'm still baking and cooking plenty, but I don't seem to have the energy to photograph and document every step.  So until I do decide if I want to take down my site, I thought I would republish this lovely recipe that is great for the wintertime.  Enjoy.


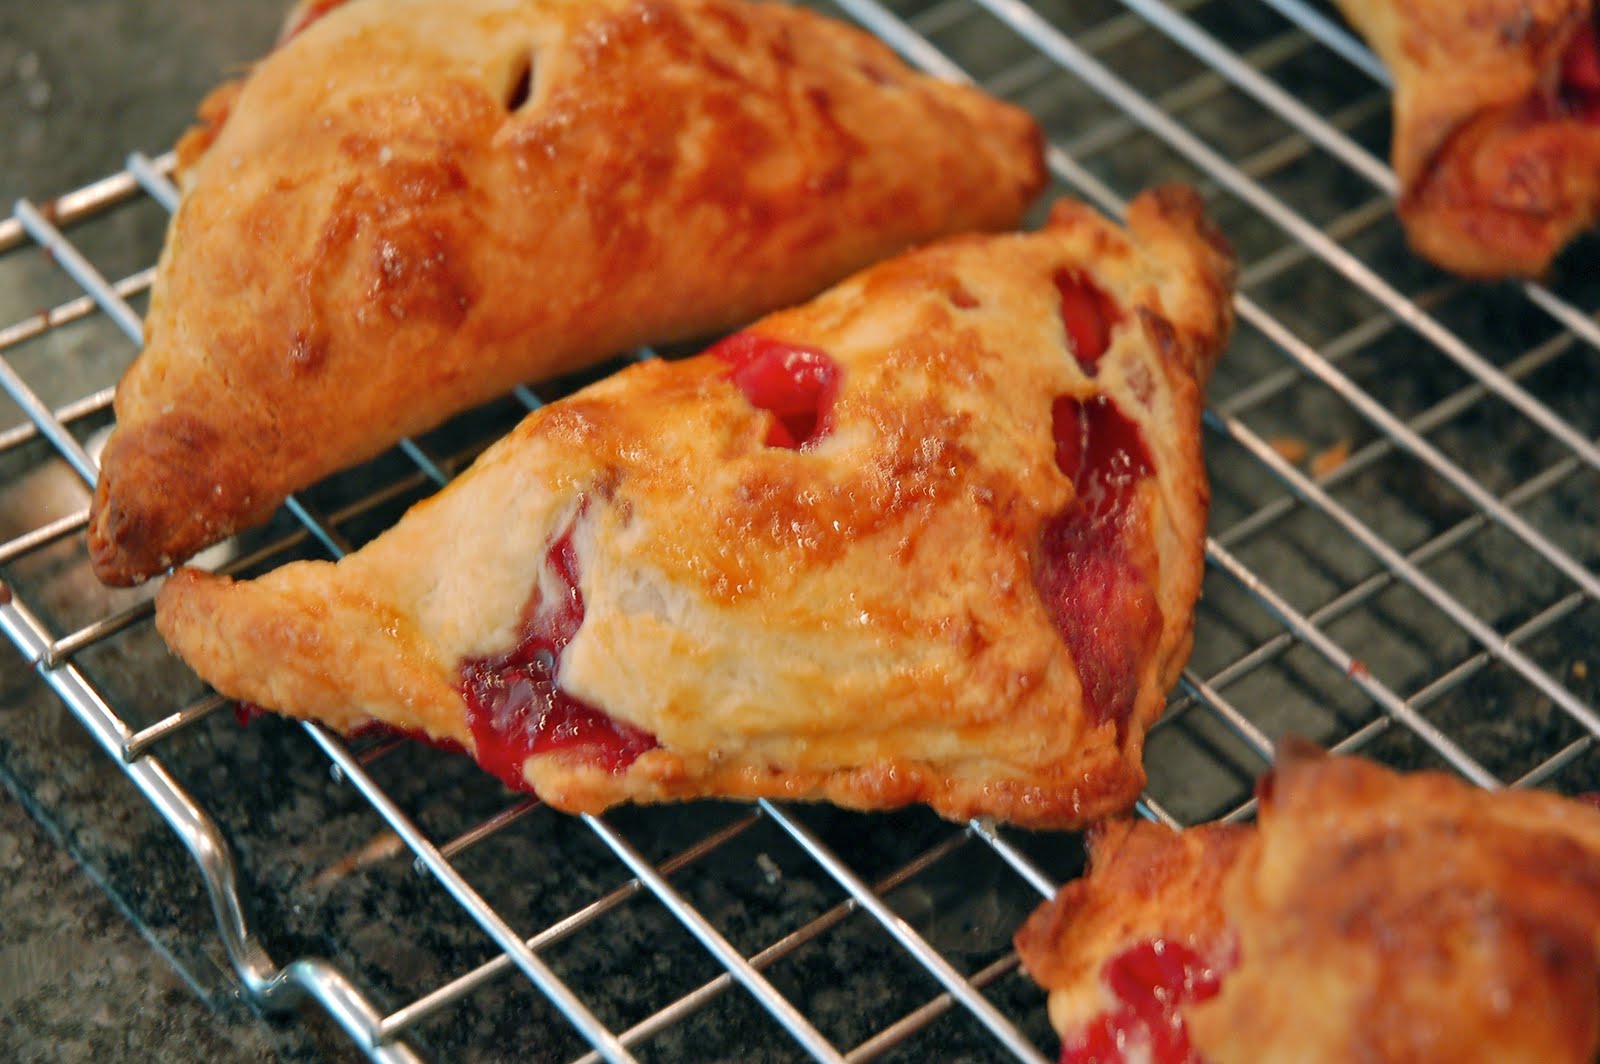
I've made these pastries several times over the last month, trying different shapes, fillings, etc.  For pickups, turnovers work great, but for desserts that get plated, these galettes contain twice as much fruihen and are terrific when people are sitting, and forks are available.  Directions for the turnovers follow. I've used Pink Lady apples here, because you need an apple that won't give off too much liquid.  The apples stay firm and the sweetness nicely complements the blackberries (if unavailable, try Pinatas or Jazz apples).  If seedy blackberries aren't to your liking, try them with blueberries.  The pastry dough is also wonderful in this galette.  It seems like a puff pastry, yet it's simple to make and has a complexity to the taste that goes great with the simple taste of the berries.

Makes 16 3-1/2-inch galettes or turnovers


Pastry
2-1/2  cups (11.4 ounces)  unbleached all-purpose flour, fluffed, scooped and leveled
2 tablespoons sugar
1/2 teaspoon salt
14 tablespoons unsalted butter, cold and cut into 1/4 inch chunks
8 ounces cream cheese, cold
1/3 cup heavy cream, cold

Filling
4 cups Pink Lady Apples, (about 4) peeled and cored
1 medium lemon
9 ounces blackberries, washed and patted dry
1/2 cup brown sugar, packed
2 tablespoons cornstarch

Glaze
2 tablespoons heavy cream
2 tablespoons coarse sugar

Directions
For the Pastry: Place the flour, sugar and salt in a processor, and process for 10 seconds to mix ingredients.   Add the butter, and the cream cheese by tablespoonfuls to the processor.  Pulse-process for 8-10 pulses until the fats are cut into lentil-sized pieces.  Add the cream, and process for 8-10 seconds until the dough starts to gather.  Turn the dough out onto a work surface. Smear bits of the dough down against the surface with the heel of the hand, to incorporate the fat into the dough (this is called Fraisage). Gather the dough together, wrap in plastic wrap, and refrigerate for at least two hours and preferably overnight.  

For the Filling: Dice the apples into 1/4-1/2-inch pieces, place in a large bowl,  and sprinkle them with lemon juice.  Stir in the sugar and all but 3 tablespoons of blackberries.  Let the mixture macerate while you prepare the pastry.

Assembly and Baking: Preheat the oven to 400 degrees F. with a rack in the middle of the oven. Line 2 large cookie sheets with parchment paper.

Cut the dough in half, wrap and return 1/2 to the refrigerator, and roll the remaining piece out on a lightly floured board, into a rectangle, about 1/2-inch thick (size isn't  all that important).  Fold the dough into thirds, like a letter, and then roll the dough again to about 1/16-inch thick


Because you are going to cut the dough into large rounds, and because it is thin, the circles tend to change shape if you try and lift them from the board onto the parchment paper.  Therefore, I like to transfer the entire rolled dough sheet to the parchment lined cookie sheet, and cut out the final shapes right on the sheet.  Once the rounds are cut, the excess dough can be removed.  For a nice serving size, I use a 6-inch cutter (the top of my cookie-cutter box is the perfect size).  Once the edges get turned up, the finished pastry will be about 3-1/2 inches round.  

If you have more than about 1/4 cup of juices in the fruit bowl, drain the fruit, reserving the excess juice.  Stir the cornstarch into the fruit.

Doing 1 pastry at a time, spoon a heaping teaspoonful of filling into the center of a round, leaving about 1-inch all around with no filling on it.  Fold the  inch of dough up, all around the perimeter of the pastry.  The dough will naturally make pleats.  


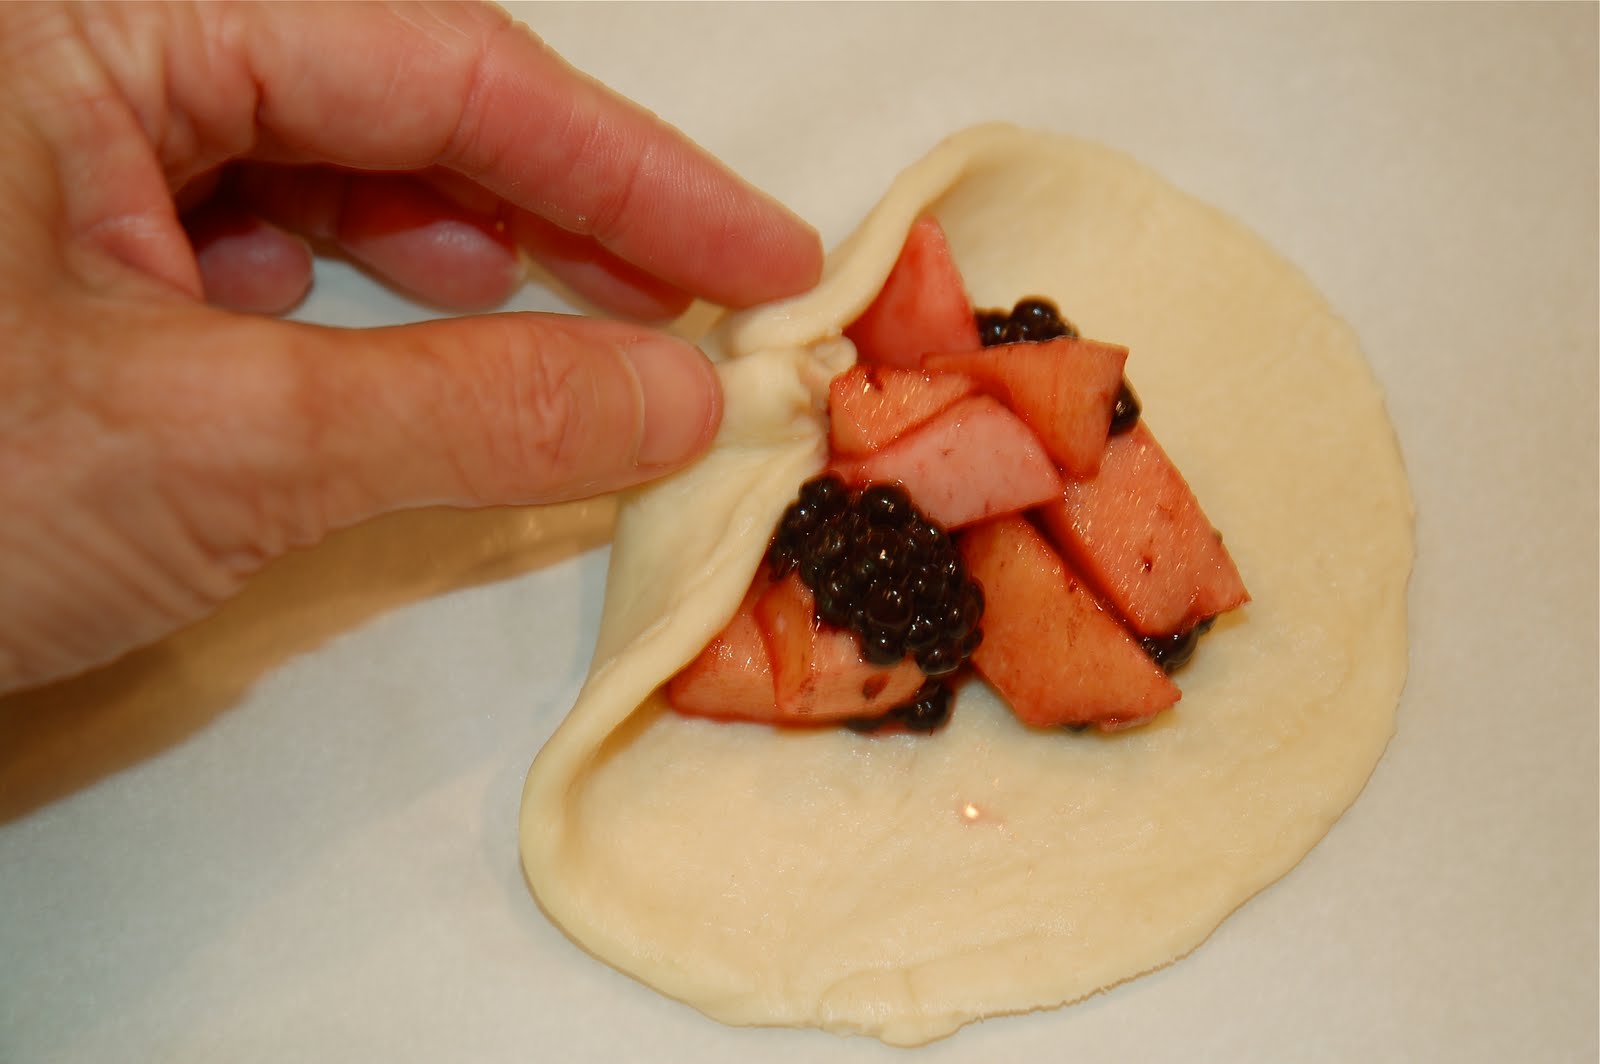
When all the edges are up, press lightly downward on the pastry top to seal together the pleats and to make it so that when the pastry  bakes it won't open up too much.  


Brush the edges with a little cream, and sprinkle generously with the coarse sugar.  

Place the cookie sheet in the refrigerator while you prepare the second sheet of pastry (if you don't have a refrigerator large enough to accommodate a cookie sheet, this step can be skipped.  The pastries won't be quite as crisp, but no one will complain!). Chill the pastries for about 10 minutes, or until the dough has just firmed up.  Spoon about 1/4 to 1/2 teaspoon of juice (not the reserved juice, but the juice with the cornstarch in it) into the center of each pastry, and set them into the oven.  Bake for about 20-27 minutes, until well browned and bubbly.   

Repeat with the second sheet of pastries.

While the pastries are cooking, you can either make a little glaze or extra fruit to add to the pastries.  Cut the remaining blackberries in half, and either stir in a little of the excess juice,  or some of the juice that has some cornstarch mixed into it.  If it has the starch, it should be heated for 10-15 seconds, or until the raw starch taste is gone and the mixture has thickened lightly.  This extra fruit can either be brushed over the hot fruit (not on the pastry) or a little bit can be spooned on to add texture and moisture to the baked pastries.  

To make turnovers, you need to cut all of the blackberries in half,  and let the fruit macerate with the sugar for at least 20 minutes.  Add the starch just before shaping, as with the galettes.  Roll the dough into a rectangle ( the dough should be a bit thicker - maybe a scant 1/8-inch). You want to cut the rectangles to be about 4x4, so roll the dough to a size that is workable for you, rolling it slightly larger than you need it in case it shrinks when you cut it.


Because your really can't have any juice in these, I like to sprinkle the rectangles with powdered sugar to compensate for the sugar that is left in the juice you can't really use.  After they are sprinkled, cradle 1 rectangle in your hand and spoon a heaping teaspoonful of drained filling into the center (use a slotted spoon because the fruit will continue to ooze juice as it sits).


Bring two opposite pointy sides and seal together, and then seal along the whole edge.


Now you need to make sure that the edge is well sealed.  I pinch it tightly closed and then roll the edge slightly upward, as if you were making a pie crust edge.  Hopefully this will prefent the turnover from splitting open when it bakes.  Set the turnover on a parchment lined sheet.  Cut a slit in the top of each turnover.  Brush the turnovers with either cream, or an egg yolk whisked with 1/2 teaspoon of water, and sprinkle with coarse sugar.  Bake at 400 degrees F. for 20-25 minutes until nicely browned.


Friday, September 14, 2012

PINK BOWS FOR BREAST CANCER


ORDER A BOW FOR BREAST CANCER AWARENESS MONTH
You can order a magnificent bow, like this, from  www.thepinkbowcampaign.organ all-volunteer nonprofit that raises money for breast cancer services and awareness. The bows come in 3 sizes to suit all of your needs, from mailboxes, doors, offices, gift packages, backpacks, cars and even as hair bows.  The bows are custom designed and proceeds benefit Susan G. Komen for the Cure.  Honor a loved one, or simply show your support by purchasing your bows now. 

Here's the adorable 5-inch bow for tennis bags, backpacks and hair


Saturday, August 4, 2012

Fresh Ricotta Crostini with Roasted Vegetables


I posted this in July, last year, but there have been some changes, so I thought I would post it again since it's that time again when produce is at its very best.  

I must have been Italian in another lifetime.  How else can one explain my daily trips to the grocery store or my obsession with making things like fresh ricotta ; ) 

If you're like me,  summer is just the best time for food - farmer's markets abound, and fresh food is the order of the day.  

With local farmer's markets, you never know what you'll be able to get on the day you visit, but I was lucky to find that one of my favorite vendors had eggplant, zucchini, peppers and some of the best looking heirloom tomatoes you've ever seen.  

Here's some of the produce from  The Specialty Farmer (Waxhaw, NC


To make simple roasted vegetables,  preheat the oven to between 400 and 425 degrees F.  Line 1 or 2 rimmed cookie sheets with heavy-duty foil, and then lay on a sheet of non-stick foil.  Using the non-stick foil allows you to roast the vegetables with a minimum of oil.  

Pare and cut vegetables to the size you desire (quicker cooking vegetables should be cut larger and longer cooking smaller so that everything will be done at the same time).  I usually cut my veggies about 1/8-inch thick and 3/4-inch in diameter, but any size is fine, so long as you keep an eye out, so that the veggies don't overbrown or burn.  For each pound of vegetables, use 1 to 1-1/2 tablespoons fruity olive oil. Toss in a tablespoon of balsamic vinegar (I like one of the specialty balsamics, especially chocolate balsamic- that I get at Olive This, near Trader Joe's in Piper Glen, Charlotte) and a little mustard, if desired.  Lightly sprinkle with salt and some chopped herbs of your choice.  Make sure the veggies are all in one layer and not overlapping.  Cook for 20-30 minutes, turning halfway through, until the veggies are brown, but not dry.

I roasted one of those large round eggplants that you see in the picture (sliced as described), and it was just the most perfect vegetable - creamy and sweet, not like so many store-bought eggplants that are bitter.

The Specialty Farmer also carries the most magnificent "yellow" zucchini.  They taste great roasted but are so sweet and the texture so nice that we actually love to eat them raw, diced and put into salads.


Roasted vegetables are wonderful as an accompaniment to any grilled meats, in pasta or on crostini, as in the opening picture.  On the crostini pictured, the lower left one has homemade herbed ricotta, roasted eggplant and an oven-dried tomato.  The upper left has the herbed ricotta, diced fresh heirloom tomatoes, and mozzarella.  The upper right has ricotta, roasted tomatoes, parmesan and fresh basil, and the lower right has roasted yellow zucchini, roasted mushrooms and the oven roasted tomatoes.  There's no limit to the combinations you can do on the crostini.  I served them last week with the ricotta, roasted veggies, fresh heirloom tomatoes and a drizzle of chocolate balsamic vinegar.  Oh my!!  More on vinegar later.

To make crostini, line a sheet with foil, and turn the oven on to high broil, with the oven rack at its highest setting.  Buy a very good quality, crusty baguette (none of that white bready stuff, please!).  I bought mine at the farmers' market from Breadsmith.  


Slice the baguette on the diagonal into 1/8 inch or slightly thicker slices.  Brush the slices lightly with olive oil (I used basil-scented oil - recipe follows), and sprinkle lightly with salt.  Broil the bread until nicely browned - watching carefully as it only takes 10-20 seconds.  In my oven, at 30 seconds the bread caught fire!

Remove the tray, turn the slices, brush with oil, sprinkle with salt and toast the second side.  Put on the toppings of your choice, break out a great bottle of wine, relax and think of Italy! 

To make roasted tomatoes, please see my post: Slow Roasted Tomatoes.
To make basil oil heat 1/2 cup fruity olive oil on medium heat just until warm.  Add 20 basil leaves.  Let the mixture sit for 30 minutes to several hours.  The flavor intensifies as the mixture sits.  If you're going to use it for dipping, where there are few competing flavors, 30 minutes is plenty.  

Fresh Ricotta
Fresh ricotta is easy to make but the recipe isn't precise.  That is, the amount of curdling agent is variable and you have to fiddle with the recipe to get the curds to form.  There are lots  of recipes on the Web for  ricotta.  It's basically a question of curdling milk, and then straining out the curds and flavoring them.   (and here we are talking about fresh milk ricotta, not whey ricotta). The recipes  are very similar, with the curdling agent being lemon juice, distilled white vinegar or buttermilk.  The first time I made it, I used buttermilk.  It worked beautifully and we loved the fresh, creamy and sweet taste.  After reading several posts online, I decided to try some of the other agents.   Using vinegar was the most intriguing recipe, so for my second attempt, that's what I used.  I made it 3 different ways - by adding the vinegar after the milk had been heated, by adding the vinegar to the milk and then heating the whole concoction, and by pouring the curds and whey through the strainer, rather than lifting the curds out of the whey and placing them into the strainer.  I really disliked the version made by adding the vinegar after the milk was heated, as the ricotta had a distinct vinegar taste.  Adding it  before, resulted in only a minor vinegar taste, but reduced volume.  When I poured all of the contents into the strainer, the texture was much more dense.  It was very good - just had a different texture, and that is a matter of personal taste.  


The mound in the front right was poured through the strainer.

For my final tries, I used lemon juice.  I must have tried this 6 times, but the only way I could get the milk to curdle was to add so much lemon juice that the ricotta tasted way too tart and lemony.  Needless to say, I would not recommend using lemon juice to curdle the milk.

You'll see a lot of discussion about whether you can make ricotta with ultra-pasteurized milk.  And the answer is YES.  In fact the trials I did with pasteurized milk (not ultra) did not work as well as the ultra pasteurized milk.  This was probably due to the kind of acid I used and the temperature I cooked it to, though.

The last issue is exactly what temperature the mixture needs to be heated to.  You'll see recipes that call for heating the milk anywhere between 160 degrees F. and 190 degrees F.  Although curds did form at 160 degrees,  the best results I got were with heating the milk to about 180 degrees but not much higher. When I let the mixture get up to 190 degrees, the ricotta was a little tough and stringy - not the creamy deliciousness that came from the buttermilk mixture heated to 180.

Fresh Milk Ricotta
1/2 gallon whole milk (I used organic ultra-pasteurized)
2-1/3 cups buttermilk, divided
1-1/2 teaspoons kosher salt

For herbed ricotta
2 tablespoons fresh minced herbs ( I used basil, thyme and sage)
1-1/2 teaspoons fruity olive oil, or basil oil
1 tablespoon  whole milk, if eating the ricotta after it has been chilled
1/2 teaspoon balsamic vinegar, optional

You'll need the following equipment:
5 quart pot
2 layers of cheesecloth lining a colander, set over a large pot or bowl
instant read or candy/oil thermometer
wooden spoon
slotted spoon

Wet the interior of the pot you are using (5 quart works well).  Add the whole milk. Heat on medium heat, stirring often until the temperature reaches 180 degrees F. (If using a candy/oil thermometer  leave it  in the pot, and if using an instant read thermometer stick it in periodically to test).  At this temperature the mixture will be starting to simmer.

Here's my whole setup:


When the mixture reaches 180 degrees F. add 2 cups of the buttermilk in a slow, steady stream, and the salt.  The mixture should be starting to curdle.  If not, add the remaining buttermilk in 2 tablespoon increments  until the mixture starts to curdle.  Do not stir, once you add the buttermilk.  You can gently move the curds to the center of the pot. Continue heating to bring the mixture back up to 180 degrees.  When the temperature is obtained, remove the pot from the heat and let the curds sit, undisturbed, for 15-30 minutes.  


Using a slotted spoon, transfer the curds to the cheesecloth-lined colander.  Once the majority of the curds have been transferred, pour the entire contents through the cheesecloth to capture the smaller curds.  let the curds drain for 15- 60 minutes, depending on how firm you want the ricotta to be.  If eating the ricotta cold, it will firm up dramatically upon refrigeration.

This ricotta has drained for about 25 minutes:


If making the herbed ricotta, add the oil, herbs and milk (if using) while the ricotta is  warm.  The ricotta is at its very best when freshly made and still warm.  Store the ricotta in the refrigerator, but bring it to room temperature before serving. 

Did I mention balsamic vinegar? I've been buying mine, locally from Olive This, in Charlotte, NC near Trader Joe's in Piper Glen. They don't have mail-order yet, but it's coming.  Another really good one comes from a small store in West Hartford, Connecticut.  You can find them at bellagustaoils.com.  I particularly like the Dark Chocolate and the Espresso Balsamic Vinegars, and find that these work great with desserts and savories alike. 


Tuesday, May 15, 2012

Skirted Wedding Cake Correction


If you read all the way to the end of my last post, you would have seen the close up of the flowers from my Skirted Wedding Cake.   I mis-spelled Scott Clark Woolley's name and had the wrong extension on his website, which is: www.cakesbydesign.cc - a slightly unusual domain.  

To repeat the info from the bottom of the last post, the flowers were made from purchased sugarpaste.  I figure that no one is going to eat the flowers, so they don't need to taste great or have only natural ingredients in them.  I used Scott Clark Woolley's instructions from his dvd " The Amazing Art of Gum Paste Flowers".  You can buy it at his website: www.cakesbydesign.cc   He also has fabulous molds and tools.  The top flower is the cattleya orchid and the sprig is a cherry blossom branch.  I wanted different colors, however, so I just found an orchid picture online with coloring that I liked, and used that as a model.   My blossoms are also just tinged with pink, and whether or not this exists in nature I don't know, but it was what I wanted for this cake.   Once you get comfortable with the technique, you can adapt Woolley's instructions to make the flowers just the way you want.  So far, I haven't found any sugar art instructor that I like better than Scott Clark Woolley, but he is very pricey.  Think about this - I have made flowers only 3 times in my life, and this is what they look like!  I'd say he is a VERY good teacher!! 

Sunday, May 13, 2012

Wedding Cake with a Textured, Pleated Skirt


After going to the cake decorating (ICWS) show in Charlotte last year, I got it into my head that I wanted to do a cake using a textured rolling pin, and to make some fondant pearls, which I thought looked really cool.  I had seen a cake that had the fondant skirt covering the  pedestal, and that was also a great look.   Using the textured fondant on the bottom tier was actually the easier and less time consuming  option.  I didn't really see how I would get the textured fondant wrapped tightly around a tier, because everytime I tried it, my smoothing rubbed out the texture.  Hence I decided to use the pleated fondant "fabric" on the bottom tier.


So how did I get the texture onto the fondant?  I looked at using stencils or a rolling pin, and again, the rolling pin seemed like the easier option.  The skirt was made by rolling the fondant into a rectangle.  I figured out the width by measuring the height of the tier and then adding 2 inches for the top and 1 inch for drape at the bottom. I rolled the bottom edge thinner so that it would look more like fabric  and the rest a little thicker so that it would be easier to handle.  After rolling it with a plain rolling pin, I rolled the textured pin over it.  


You can see the length was about 20-24 inches, because that seemed to be the longest length I could work with before the fondant would tear or stretch too much.  So for my 10-inch layer, I probably needed about 5 feet of fondant.  I was surprised that the 2 batches I had made for the tier was enough to do the skirting.  Of course, if you want the cake to look nice when it is cut, you should probably cover the tier first in a thin, smooth layer of fondant, and then put the skirting over that, as you can't really serve and eat the skirt (I used buttercream under all of my fondant, but put on a thicker layer on this tier because I knew that it wouldn't be served with the fondant on it.)


You can see that I gathered it one pleat at a time, by overlapping the pieces at the top of the cake.  When you get to the end of the strip, though, the edge should be left straight.  When you start the next piece you tuck the edge under so it looks like the pleat continues.


When the whole thing is completed, you can put a fondant circle in the center to help make a level top for the tier that will go above.  


To finish the skirt, I sprayed it with Super Pearl.


You might have noticed the metal rod sticking up from the center of the cake.  I used a support system called Cake Stackers (www.cakestackers.com).  While I don't have a great need for making cakes super-stable for transporting, I did have trouble getting everything lined up the last time I made a tiered cake, and I thought this would save me a lot of time cutting dowels and trying to center everything.  It is a wonderful system for stacking cakes and well worth the investment.

Here you can see the system in place, awaiting the next tier.


And the next tier gets dropped on.  The system comes with cake boards that have holes for the center post and the 4 supports.  You only need to locate them with your fiingers as you drop the cake on.  It makes alignment perfect every time.  If you look closely you'll see that the fondant on the second tier isn't as smooth as it could be.  The cake was a little warmer than it should have been, and the all-butter buttercream underneath was squishing around a little.  It's a good thing this was a present and not a job!  Some of the flaws will get covered by the strips of textured fondant that I'm going to apply, thankfully! By the way, I used clear piping gel  to attach both the strips and the pearls.


I had planned to put a simple pearl border around the bottom of the second tier, but the pleating made for too big of a gap, and too uneven surface, so another trim needed to be applied.  I opted for a "hemmed" band, which I made by rolling a piece of fondant with the plain and then textured roller, and then folding the edges under to make a hem.  The pearls could then be placed on top of the band.


The pearls were made with a silicone mold from  http://www.firstimpressionsmolds.com/bordersandropes.aspx

These are the 10 mm pearls.  There's a very nice video on how to use the mold at www.cakesuppliesplus.com. I did find that when using my marshmallow fondant  I needed to freeze the mold for 10 minutes before popping out the beads, and then refrigerate them for 5 minutes after dusting them with super pearl and just before placing them on the cake.  Clear piping jel makes a nice glue for the beads.

About Fondant
I used 5 recipes of marshmallow fondant:
2 recipes kneaded together for the 10-inch tier
1 recipe for the 8-inch tier
1 recipe for the 6-inch tier
1 recipe for trim and pearls

There are several good videos on how to make marshmallow fondant.  I make mine in a heavy-duty mixer, using the following ingredients:

10 ounces (1 bag) mini-marshmallows
2 tablespoons water
41/2 cups + 1/4 cup powdered sugar

Place the marshmallows and water in a large microwave-safe bowl.  Microwave 30 seconds on high. Stir until mixed.  Continue cooking until melted (amount of time varies based on temperature of water used and type of container used - anywhere between 1-2 minutes should do the trick).

Transfer the marshmallows to a mixer bowl.  Sift in 4-1/2 cups powdered sugar.  Mix on medium-low until the mixture comes together. Switch to a dough hook, and knead the mixture for a few minutes.  Finish the needing by hand, by putting some vegetable shortening on your hands, but dusting the work surface with powdered sugar.  Add in a little more water or powdered sugar, as necessary, to get a dough that is supple but not too sticky.  If the fondant tears, it is too dry.  Wrap in a sealed plastic bag and store at least overnight at room temperature.  If storing more than a few days, refrigerate it but let it come to room temperature before using.  You can also  microwave cold fondant for 10 seconds to bring it back to room temperature faster.

Flowers

These I made out of purchased sugarpaste.  I figure that no one is going to eat the flowers, so they don't need to taste great or have only natural ingredients in them.  I used Scott Clark Woolley's instructions from his dvd " The Amazing Art of Gum Paste Flowers".  You can buy it at his website: www.cakesbydesign.cc   He also has fabulous molds and tools.  The top flower is the cattleya orchid and the sprig is a cherry blossom branch.  I wanted different colors, however, so I just found an orchid picture online with coloring that I liked, and used that as a model.   My blossoms are also just tinged with pink, and whether or not this exists in nature I don't know, but it was what I wanted for this cake.   Once you get comfortable with the technique, you can adapt Woolley's instructions to make the flowers just the way you want.  So far, I haven't found any sugar art instructor that I like better than Scott Clark Woolley, but he is very pricey.  Think about this - I have made flowers only 3 times in my life, and this is what they look like!  I'd say he is a VERY good teacher!!

If you have any other questions that I haven't covered, please feel free to contact me. Happy Baking!


Saturday, May 12, 2012

Roberta's Wedding Cake

The story and more how-to photos will be coming later this weekend.  Congratulations Roberta and Phil!


Tuesday, May 1, 2012

Pecan Pie Bars


This recipe is no longer available.  You can find it in Amazing Desserts download.  Contact me to purchase a copy.


Monday, April 9, 2012

Passover Recipes Now

These recipes are in my PDF Book, Amazing Passover Desserts
Contact me for a copy


Passover Chocolate, Chocolate Cherry Cake


Passover Hazelnut, Pear and Raspberry Torte


Passover Salted Caramel Brownies 

Saturday, March 31, 2012

Passover Salted Caramel Brownies


The full recipe is in my  PDF downloadable cookbook, Amazing Passover Desserts. 
Contract me to purchase at $5.00


If you'd like to see the ingredient list and what's involved before buying, read on.

You will truly amaze your guests with these rich and decadent bars.  What makes Passover caramel brownies challenging is that you'll need to make the caramel from scratch, rather than using caramel candies, and you can't use corn syrup, which helps to keep caramel from crystallizing.    For Passover, I've replaced corn syrup with honey and added a little lemon juice.  The lemon juice not only helps to cut the cloying sweetness of honey, but it also helps prevent crystallization.  Vanilla also helps to mellow the honey flavor and allow the caramel taste to come through.

 If you can find a 60% chocolate to use in these, you’ll have the richest flavor possible.  Nuts are definitely optional.

Dairy
MAKES 12-16 BARS

TIPS
Buy Passover extract at www.kosher.com or www.allinkosher.com .  Alternatively, scrape out the seeds from 1/3 of a Niellsen-Massey® vanilla bean, add to the sugar and continue with recipe.  Reserve the bean for another use, or packaged vanilla sugar can also be used.  Make sure to read the instructions on the sugar, as strength varies.

For chocolate chips, go to: www.choclat.com or www.ohnuts.com or www.allinkosher.com

Caramel Filling
water
mild honey (such as Clover)
granulated sugar
heavy cream
unsalted butter
Passover vanilla, vanilla bean or vanilla sugar (see above)
flaked or kosher salt, optional
lemon juice

Brownie Base
unsalted butter, cut into tablespoon-size chunks
60% Passover Chocolate chips AND Passover semisweet chocolate chips, divided  OR use all semisweet chocolate
granulated sugar
Passover vanilla extract (or water)
water

large eggs, room temperature
matzo cake meal
pecan or walnut pieces, optional

For the Caramel
        You’ll need a large pot to make the caramel, as it tends to foam and rise as it is cooking and when the cream is added.  I use a 5-quart, but a 4-quart would probably be fine, too.  Because you can’t use corn syrup for Passover, you’ll be using honey, which already has a brownish cast to it, so it will be very difficult to gauge the color if you use a non-stick pan.  A heavy-gauge stainless pot works best, reducing cooking time, and providing even heat to reduce burning.


    Off heat, place the water,  honey and lemon juice into  the pot, and stir gently to mix the ingredients together.  Very gently, begin to add in the sugar by pouring a little sugar into the center of the pot, and pushing the water mixture from the outside of the pan to the center.  You won’t be stirring, but pushing towards the center, as if you are on a clockface and pushing from each number towards the center.  Continue to add the sugar, and push until all of the sugar is moistened.

     Place the pot over medium-low heat, and continuing in the pushing manner, heat the mixture until it begins to simmer (keep the heat low, as you want the sugar to dissolve before it starts to actively simmer).

     Cover the pot, increase the heat to medium, and cook for 3-5 minutes.  The mixture should be bubbling and clearish – meaning that all of the sugar has dissolved.  Uncover the pot, raise the heat to medium-high, and continue to cook for 3-10 minutes WITHOUT STIRRING, until the mixture is medium amber in color (the time will depend on the pot you use and your cooktop).

         While the sugar is cooking, combine the cream and butter in a microwave-safe container, and microwave it for 30 seconds to heat it and melt the butter. 

            
      Before you stir in the cream, it is imperative that you wash off the spoon, so that when you stir in the cream, there aren’t any undissolved sugar crystals that get re-introduced, as these will make the caramel grainy (that’s why you’ve elaborately pushed the sugar, rather than stirring – to avoid sugar crystals clinging to the sides of the pan).  Once the sugar mixture is the color you want, tip the pain away from you, and add the cream mixture all at once. Stir in the salt.  Stir gently until the mixture is smooth and slightly thickened. 


      Pour the mixture into a Pyrex bowl or other heat-resistant container, and stir in the vanilla.  Set the mixture aside to cool and thicken.

For the Brownie
         PREHEAT THE OVEN TO 350 oF with a shelf in the middle of the oven.  Line an 8-inch square cake pan with two layers of aluminum foil, so that the whole inside of the pan is covered in foil.  Grease and sprinkle with matzo cake meal.


1.     Place the butter and the 1 cup of bittersweet chocolate (or 1 cup of semisweet chips if the other isn’t available) in a large microwavable container.  Microwave on power 5 (medium) for 2 minutes.  Stir to blend.  If the chips and butter are not melted, continue to heat in 30-second intervals on power 5, until everything is melted.  Stir well to mix the ingredients together. Whisk in the sugar, vanilla extract and the water.

2.     Whisk the eggs together and then whisk them to the chocolate mixture, constantly whisking until they are well mixed in.  Using a wooden spoon, whisk in the matzo cake meal, in six additions, until well blended. Spread about half of the batter into the prepared pan (this will be about 1-1/4 cups batter, and it should form a layer that is a little thicker than 1/8-inch thick).

3.     Sprinkle 1/3 cup of semisweet chocolate chips over the batter, and press them in so that none of them are exposed. Stir the remaining 1/3 cup chocolate chips into the reserved batter.

4.     Place the pan in the middle of the oven, and BAKE for 15-20 MINUTES until the top dulls and is no longer moist-looking.  Set the pan on a cooling rack.  Using the bottom of a wooden spoon, gently poke 16-20 holes in the brownie layer.  These will pool with caramel and will taste fabulous when the brownies are cooked.  Let the brownie cool for 15 minutes.

5.     If the caramel is too sticky, add 1 teaspoon cream to it, and microwave on high for 30 seconds.  It should now be spoonable.  If it isn’t add another ½ teaspoon cream, and microwave for 10 seconds (you want it thick enough so that it won’t run out of the brownie or down the sides of the top, but you don’t want it so sticky that it is unpleasant in the mouth).  Spoon all but 1/3 cup of caramel onto the brownie, paying attention to fill the holes.  You don’t need to go to the edges because these will be cut off.  Sprinkle the nuts over the caramel layer.   Let the caramel firm up for 15 minutes.

6.     Spoon on the remaining chocolate batter in “globs”, and then gently spread them together so that the brownie batter covers the caramel. Set the pan back in the oven, and bake for 15-20 minutes, until the top looks dullish and cooked.  Do not do a crumb test, as the caramel and melted chocolate chips will make it seem that the brownie isn’t cooked even when it is done.  It’s better to err on the side of underdone, as you can always refrigerate for a little while to firm the brownies up, but if they are overcooked they will taste dry and the matzo meal flavor will overtake the taste.

7.     Transfer the pan to a cooling rack.  Let the brownies cool completely, and then refrigerate for about 40 minutes – just enough to make them firm enough to cut, but not so much that the chocolate chips get hard.

8.     To cut the brownies, lift the whole thing out of the pan, using the aluminum foil to transfer it to a cutting board.  The brownies will be stuck to the sides of the foil.  Do not attempt to remove the foil, or the brownies will break apart.  Instead, cut off the outer quarter-inch of brownie from all sides.  Once this is done, you’ll be able to cut the brownies into bars.  They are very rich, so cut small squares.

To decorate like the opening photo, melt 1 ounce chocolate with 1 teaspoon oil.  Pour the mixture into a plastic bag, make a tiny hole in the tip, and drizzle on a decoration.  Repeat with caramel, if desired.

The brownies can also be decorated with just caramel and a sprinkling of flake (fleur de sel) or kosher salt (for true salted caramel lovers only).  If the reserved caramel has been refrigerated, microwave it for 10-20 seconds, just so that it will run, but is thick enough to pool on the brownies and not run down the sides too much.  Use about ¼ teaspoon total amount of salt.  For the flake salt, you might want to just crush it between your fingers before sprinkling a tiny bit on the top of each pool of caramel.


For brownies that are a bit more firm and fudgy, refrigerate the brownies for at least 2 hours, but remove them from the refrigerator at least 2 hours before serving.

MORE TIPS
The amount of cream isn’t exact because ingredients and equipment vary. If you add too little cream, the caramel will be sticky – like candy.  If too much, it will be runny and the brownies will be messy and hard to cut.  After you make them a few times with your own equipment and the kind of butter and cream you like, you’ll figure out exactly what to do.

How to cut the brownies:  Use a long, sturdy knife, and have a warm damp cloth and a towel nearby.  Saw through the top crust with a serrated knife and then press down and through the brownie.  After each cut, draw the knife out, rather than pulling it up, and wipe it with the damp cloth and then dry it before the next cut.  This technique will eliminate crumbs and mess from getting on the top of each brownie.

CAN PREPARE AHEAD 
Room temperature or Refrigerated – 2 days, Frozen – 3 months
      Serve at room temperature.


CONTACT ME FOR THE ENTIRE COLLECTION OF AMAZING PASSOVER DESSERTS
NOW FOR $5.00