Monday, January 10, 2011

Filled Chocolate Cupcakes - The recipes - revised January 2011

This is an update to this recipe which was put up in September. I was making them again recently (January '11), and realized that there was an error in the ingredient section (probably, because as you can tell from the following text and photo, I had trouble reading my soiled recipe copy).  The gram weight of flour was correct, but the corresponding cup measurements were not.  If you have printed out this recipe, please check the updated ingredients. 

In addition to this, if you read the prior post, you might have noticed that I wasn't happy with how tender the cupcakes were.  This time around, I did some more experimenting and found that using bread flour instead of all-purpose made for a sturdier cupcake, and, I added another egg.  This made the cupcakes firmer, also helped them rise higher and allowed me to get the cupcakes out of the liners more easily.

The following is the original post, with the appropriate corrections made to the ingredients.
----------------
I've been trying to get this post done since the summer, but I had to grab a few minutes late at night to write up my recipes, because the days were filled with BCC Rally auction stuff.  Now that the auction is over, I finally have time to post.  But when I go back to see what I've done, I can hardly read the recipe because it's covered in chocolate! 


That's why you need a CD-rom cookbook (mine, of course).  Because instead of having a cookbook that's covered in chocolate, you can have a few recipe pages that you've printed off, and when you're done, you toss the messy things out!  But now, on to the recipe!

The Cake

The first time I made the cupcakes with Veronica and Jasmine (see Filled Chocolate Cupcakes, Part 1, I used a light version of my Chocolate Layer Cake.  They were delicious, but a bit too tender.  I think they were so tender because we used the maximum amount of milk (3/4 cup) and because we mixed them by hand.  When I made them again, I used just a bit more than the minimum, and they came out much better - a little denser, which held up better for a pick-up type cake.

Makes 42 mini-cupcakes or 12 regular cupcakes

2-1/2 ounces semisweet chocolate, chopped
1 tablespoon oil

1 cup minus 1-1/2 TB (122 grams) bread flour, measured by fluffing, scooping and levelling*
2 tablespoons  unsweetened cocoa powder
3/4 teaspoons baking soda
1/8 teaspoon salt

5 tablespoons (2.5 ounces) unsalted butter, cut into tablespoons and at room temperature
1/4 cup light brown sugar
1/2 cup sugar
1/2 teaspoon vanilla

2 large eggs, room temperature
1/4 cup + 2 tablespoons sour cream, room temperature

1/3 cup cup milk (skim or regular), room temperature

Preheat the oven to 350 degrees F. with an oven rack in the middle of the oven. Line muffin pans with liners.
You can see that they sort of pop up and don't stay down in the cups.  Just give them a good shove from above, and let the sides pleat.  When you add the batter, they will stay down.
Place the chopped chocolate and the oil in a microwave-safe container. Micro-cook on medium (#5) for 1 minute. Stir and then reheat in 15-second increments on medium power until the chocolate is melted.

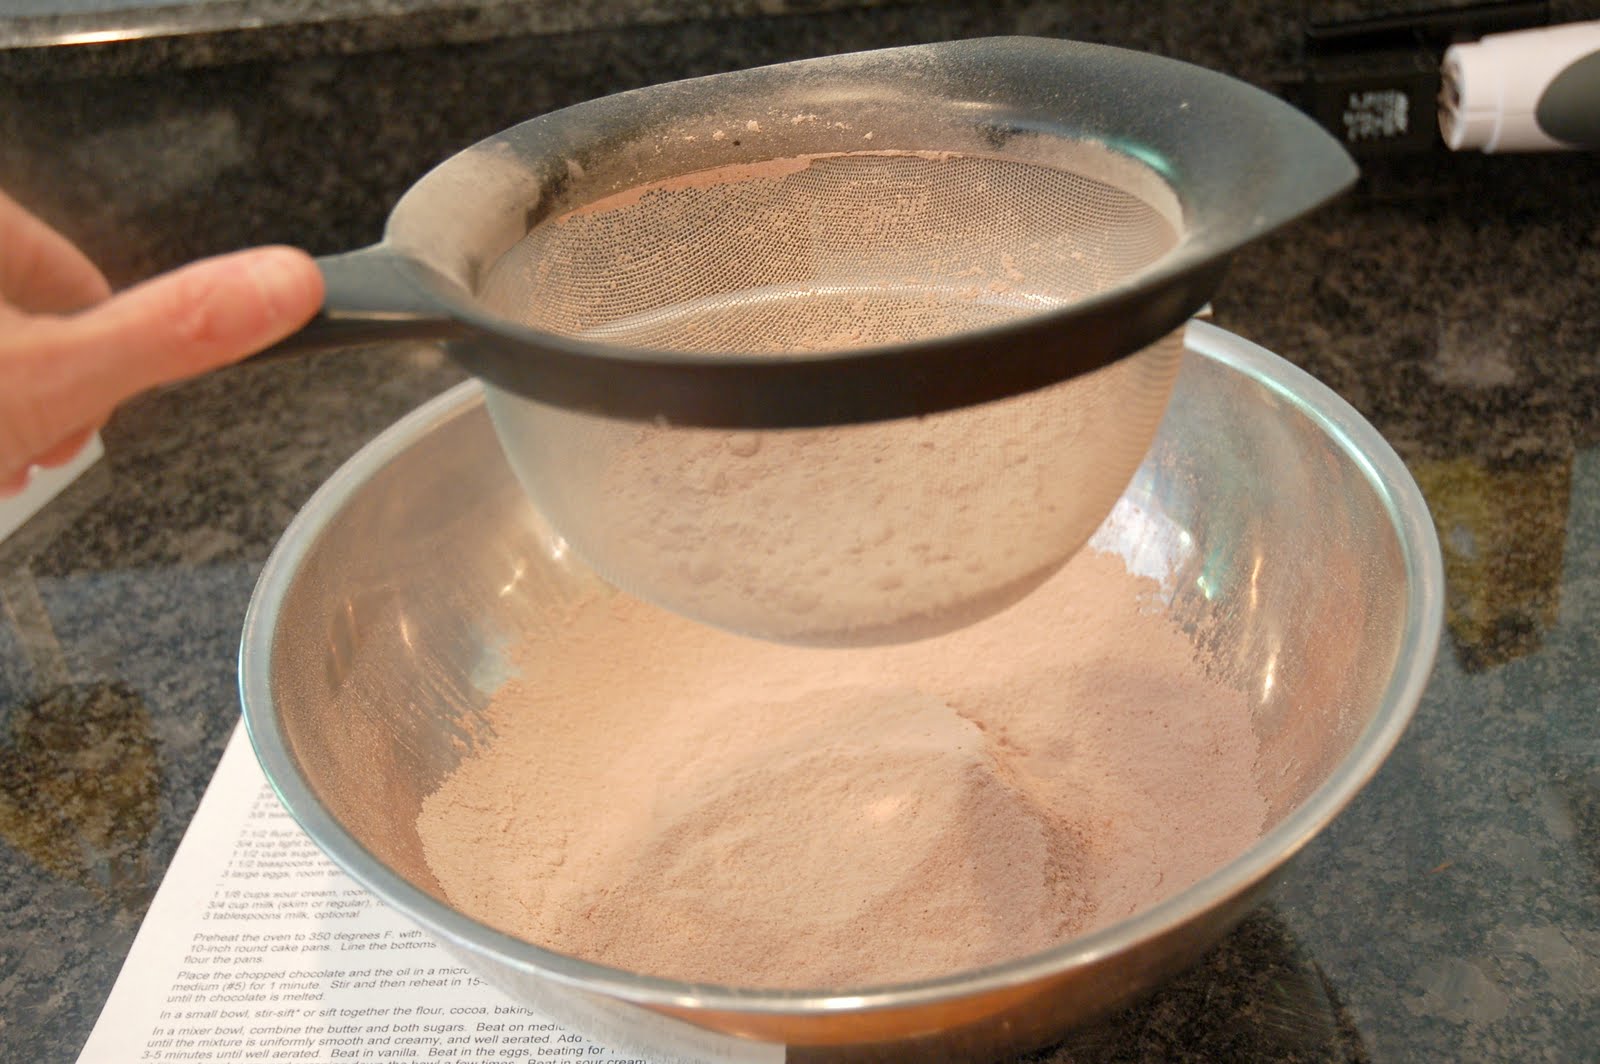
In a small bowl sift together the flour, cocoa, baking soda and salt. Set it aside.


In a mixer bowl, combine the butter and both sugars. Beat on medium speed for 3-5 minutes until the mixture is uniformly smooth and creamy, and well aerated. Beat in vanilla. Add the eggs, beating for 1 minute after the addition of each egg, and scraping down the bowl a few times.

On low, beat in the sour cream and chocolate. On low, in 4 additions, beat in the flour mixture alternately with the milk, starting and ending with the flour. (This is actually easier to do by hand, because the batter doesn't tend to separate when you do it by hand, but it does make the cake more tender when done by hand).


Spoon the batter into the muffin cups, using one spoon to scoop up the batter and the other to push the batter into the pans. Fill the cups 1/2 to 3/4 full.

Bake for 8-11 minutes for the minis, or 15-20 minutes for the full-size cupcakes, until a tester comes out clean. Set the tins on a wire rack until the cupcakes are cool, and then remove them from the pans.

The Filling
I used whipped cream to fill the cherry-topped cupcakes, and Simple Vanilla Buttercream for the ones that look like Hostess cupcakes.  The cream was easier to make, but the buttercream tasted far better. I've been making my buttercream a little thicker and sweeter lately, by adding a little powdered sugar to my basic recipe, but for this I wanted a filling that was very creamy - again so that it would be reminiscent of Hostess cupcakes. To do this, I used less than half of the powdered sugar as usual.

It’s ultra important that the butter be at the right temperature for this recipe to work, AND THE ROOM!  If the room is too hot, the buttercream will never form.  The room should be no warmer than 74 degrees - and colder is even better.

To get the butter the right temperature, cut it into tablespoons and let it stand on a cutting board until barely soft. Using your thumb, push down on each pat to flatten it into the board (it will still be very firm, and will split when you press down on it). In 3-5 minutes the butter should be ready. If you press down on it with your thumb, it should yield readily, but should not be soft and melty. If the butter is a little firm, it can always be beaten a little bit more, but if too soft, you’ll have to refrigerate it, and start over. I always aim for a little bit harder, rather than too soft.

2-1/2 sticks (20 tablespoons) unsalted butter, at cool room temperature
1 pound jar Marshmallow Fluff (this is a natural product containing only eggs, corn syrup and flavoring - so don't use another brand unless you check the ingredients)
1 teaspoon vanilla extract
2-3 tablespoons sifted powdered sugar
1-2 tablespoons corn syrup, to taste
2-3 tablespoons milk to soften the buttercream, optional

Now that the butter is at the proper temperature, scrape the butter into a mixing bowl and beat it until creamy (1 or 2 minutes.) Scrape down the bowl. Beat in the powdered sugar until fluffy. Add half of the Fluff, and beat on medium high until blended. Add the remaining Fluff, and continue to beat, on medium-high, for 2-5 minutes or until the frosting is fluffy and light and no longer marshmallowy.
This is what it should look like.


If the buttercream, does not form after beating for 5 minutes, place it in the refrigerator for 10 minutes, and then try and beat it again. After the buttercream forms, beat in the vanilla, corn syrup and milk, to taste.

If you put a coupler in the pastry bag before filling it, you'll be able to try tips to find the one that works best with the size cupcake you are making.  The piece on the left goes into the pastry bag, and then the tip gets put on, and the nut, in the center, keeps the pastry tip tight.

Choose the tip that fits the size of the cupcake  (I used Magic Tip #8 for filling, and Wilton #21 star for filling)
Stick the tip into the bottom or top of the cupcake, depending on how you finish them (if you plan to add chocolate icing instead of having the frosting come out of the top, fill from the bottom, otherwise you will see the dimple where the frosting went in.  It's easier to fill them from the top.  For one thing, you don't have to take them out of the wrappers, which give some support to the cupcake so it doesn't split as you fill it.  You can also feel when the cupcake is filled with the buttercream, and can stop before the cupcake starts to split.


You can see they look great with nothing more than some frosting coming out the top.  But they're also fantastic, and  look like mini Hostess cupcakes if you frost them with chocolate icing and vanilla icing decoration.
Chocolate Icing
My notes didn't say if the following recipe is  the right amount to frost all of the cupcakes (sorry - I either post it now, or you have  to wait another year until I make them again!)

3/4 cup whipping cream
8 ounces semisweet chocolate, chopped
2 cups powdered sugar
2 tablespoons hot water

Heat the cream in a small microwave-safe bowl for 30 seconds. Stir in the chocolate.  Let it stand for a minute and then stir.  If the chocolate isn't completely melted, heat in 10-second increments on power 5, stirring between each, until the chocolate melts completely and the mixture can be stirred into a smooth glaze.

Sift the powdered sugar into a small bowl. Stir the chocolate into the powdered sugar. Stir in half of the hot water.  The mixture should be thin enough to fall off of the spoon in a steady stream.  If it isn't, add the remaining hot water, 1/2 teaspoon at a time.

Dip the cupcakes into the glaze.  Turn the cupcakes right side up and let the glaze firm up a little.

 In the photo below you can see that I filled the cupcakes from the top, and I wasn't able to get the top level, so that the chocolate dips down  in the center.  You can add a decorative design, as I have here, to cover the dip, or you can add the vanilla glaze


Vanilla Glaze
1 cup  powdered sugar
1/2 teaspoon vanilla
2 tablespoons whipping cream

Sift the powdered sugar into a mixer bowl.  Whisk in the vanilla and the cream.  The glaze should be thick enough to pipe.  Add a little more sugar or cream, if necessary to get the proper texture.

For this amount of glaze, you'll need a very small piping bag.  You can make one out of a plastic storage or zip-top bag.  Cut the bag in half, horizontally.


Put the bag into a small glass, and then fill the bag


Hold the bag closed at the top, with the filled part resting in your palm, and your thumb and index finger holding the top (you can put a rubber band around the top if it is easier).  Gently squeeze the filling toward the tip.  Make a very tiny cut in the tip with scissors.  Pipe on the decoration, and then refrigerate until 30 minutes before serving.  


Wednesday, December 29, 2010

Cheese Blintzes with Berry Sauce

I thought it would be simple to put together a nice blintz recipe to put up in time for New Year's Day brunch.  But then again, somehow I forgot that I am a compulsive food nut!  I started with my original recipe which called for 3 eggs, 1 cup of skim milk, 1 cup of flour and a few other ingredients (we'll get to the filling in a minute).  These wrappers were good, but they weren't quite as sturdy as I would have liked them and the batter was just a tad heavy which made swirling the pan a little harder than necessary.  I had seen some recipes on the Internet that varied a bit, and so I proceded to make them again, and again, and again until I can barely stand the thought of blintzes (at least in the near future).  I tried adding more milk, using water instead of milk, adding melted butter, etc.  The ones made with water were flat tasting and didn't brown up enough.  The ones mades with less egg and more flour were tough and dry and stuck to the pan.  Finally I thought I would try adding a little more egg, and voila - I had the wrapper I was after.  As for the filling, you might see recipes that call for pot cheese, farmer's cheese, cottage cheese or ricotta.  Personally, I have never seen pot cheese in the store, and I knew that the farmer's cheese that we get here was totally wrong - it is a brick of cheese with a dense texture- not at all the right texture or taste (we don't get Friendship farmer's cheese, which I understand might be perfect).  Ricotta didn't work for me either because it contains vinegar, and the taste is all wrong.  After researching pot cheese and farmer's cheese I learned that traditionally, these are fresh milk cheeses that aren't readily available because they spoil fast, but that they are basically cottage cheese that has been drained so that the texture is drier and firmer (and that's what I had always used in the past).  I made my filling with a low fat cottage cheese, and also a full-fat cottage cheese, but the difference wasn't great, so I opted to stay with the lower fat cheese.  Don't forget that once you press out the liquid, the denser cheese is also denser in calories and most other nutritional elements.  Besides the type of cheese, there were instructions for processing the cheese, whipping the cheese, hand-beating the cheese or stirring it.  For my Light Jewish Holiday Dessert cookbook, I had made some lowfat blintzes, in which I had processed the filling.  I remembered that I didn't quite like the texture this made, but it hadn't made much difference for that book, because there was also an apple filling inside of the blintz.  But with just cheese,  I wanted this filling to be perfect.  I tried the processing method again, and also used the beater on another batch. Both of those methods created a cheese that was too thin. I decided to stir everything together by hand, pressing the cheese against the side of the bowl to make it a little smoother (I don't think for blintzes that you want a totally smooth filling).  I also used the filling at room temperature and one batch with refrigerated cheese and the difference was vast.  The ones with the room temperature  cheese were runny and grainy, while the chilled filling hung together nicely and remained creamy.  Even with the colder cheese, the filling wasn't as firm as I would have liked it.  I did some more experimenting adding more egg  and then egg and flour to the filling, and here again, the results were spectacular.  The filling with more egg and a little flour held on to its shape even after the blintzes were fried and warmed in the oven.  I'm sure that those of you who eat blintzes have a mental idea of what is perfect for you.  Now that you know the effects of these ingredients, techniques and temperatures you'll be able to tweak the recipe to create your own perfect version. By the way, the berry sauce was also an adventure (recipe follows). 
Happy New Year!

Makes 10 Blintzes

Blintz Batter
2 large pasteurized eggs
1/2 cup milk (skim to whole, your choice)
1/8 teaspoon salt
1 teaspoons sugar
1/2 cup (65 grams) all-purpose flour, measured by fluffing, scooping and levelling

Cheese Filling
2 pounds cottage cheese (brand matters - use one that tastes sweet and delicious to you!)
2 ounces light cream cheese, room temperature
2 tablespoons powdered sugar, or to taste
1/2 teaspoon vanilla extract
1 large pasteurized egg, whisked (instructions for regular eggs follow)

1 tablespoon all-purpose flour

2 tablespoons unsalted butter, for frying

Berry Topping
3 cups blackberries
3 cups raspberries
2 cups blueberries
1/3 -2/3 cup sugar, to taste
dash cinnamon, optional
1 teaspoon cornstarch,  optional

For the very best results, you'll want to make the filling far enough in advance so that it will be cold when you fill and fry the blintzes.   You can also make the wrappers a few days ahead, if you like.  If you want  the berries softer and sweeter, make them in advance, too.  At the very least, you want to make the berry topping at least 1-2 hours ahead of serving, especially if using blackberries, which have very firm center cores.

For the blintz batter, place the eggs,  milk, salt , and sugar  in a food processor bowl.  Process until well blended.  Add the flour, all at once.  Process for 5 seconds to blend the ingredients.  Scrape down the bowl and pulse for 3 more seconds to blend well.  Transfer the batter to a storage container.  Refrigerate for at least 1 hour, and up to 3 days.

To make the filling, you'll need to drain and press the moisture out of the cheese.  I've tried cheesecloth, the traditional method, but find it messy and inefficient.  I find that the easiest way to do this is in a knee-high stocking.  Cut off the top 3 inches of the stocking, and then put it in a tall glass with the top of the stocking cuffed over the top of the glass so that it will stay in place when you fill it with the cheese. 

 Hold the stocking over the sink with one hand, squeeze all of the filling towards the tip of the stocking. 

Continue to squeeze the cheese until the stuff coming out looks very thick or like curds are coming out.

The best way to get the cheese back out of the stocking is to put the stocking back into the glass, fold the top over the glass (as in the beginning), and then holding onto the stocking on the outside of the glass, turn the glass upside down over the bowl.  Shake the glass crisply and the cheese should start coming out of the stocking. Once it starts coming out, you can squeeze the stocking to help it along. 


You have now made pot cheese or farmer's cheese!  Add the cream cheese and press it against the sides of the bowl with a wooden spoon.  Once it is smoothly against the bowl, start mixing the cottage cheese and cream cheese together by mashing it against the side of the bowl.  The object is to mix the two together and to smooth out the cottage cheese a little - you are not aiming at a smooth filling - just one that is smooth enough to be pleasing on the tongue!  Stir in the remaining filling ingredients until well blended.  Transfer to a covered storage container, and refrigerate until cold or up to 1 day ahead.

Before starting the blintz wrappers (crepes),  have a piece of parchment paper near the stove onto which you will flip the crepes.  Remove the blintz batter from the refrigerator and stir it.  Heat a small nonstick pan over medium to high heat (depending on your stove and pan), until a droplet of water rolls around in the pan ( you can also use a carbon steel crepe pan, but you'll need to lightly butter it).  Ladle about 3 tablespoons of batter (a scant 1/4 cup) directly into the center of the pan.  Immediately pick up the pan and swirl the pan around and around so that the batter widens out  to fill the whole pan with batter.  By the time you do this, the crepe will almost be finished cooking.  Set it back down on the burner to finish cooking any spots that still look shiny.  As soon as the entire surface is dull, the crepe is done. 


To get the crepe out of the pan,  start the edge with a fork and then just turn the pan upside down over the parchment.  Once the edge is raised you'll be able to grab it and pull, and the whole crepe should come down onto the parchment paper.  You want this side of the crepe to be nicely browned, but not too brown or burned.  Adjust the burner accordingly.  On my heavy-duty gas range with an All-Clad pan, I start off medium-high and then need to turn it down to medium-low, but each stove will be different.


For my taste, the crepe on the left hand is too light, while the one on the right is just a bit too dark.  You can stack the crepes one on top of the other, and fill them as soon as they are all done, or cover them with wrap and refrigerator for several days before using.

Make the berry topping, sometime before you start filling the blintzes, either within 2 hours or ahead. 

In a small pot, combine 1 cup washed blackberries and 1 cup of washed blueberries**.  Place the remaining washed berries in a bowl.  Add 1 tablespoon sugar to the berries in the pot and 1/4 cup sugar to the berries in the bowl.  Let both sets stand for 10 minutes.  Mash the berries in the pot with a potato masher or fork. 
Place the cornstarch in a small bowl and stir in 2 teaspoons water.  Bring the berries to a boil, reduce the heat and let the mixture cook for 4 minutes.  Stir in the cornstarch mixture, bring it back to a simmer and let the mixture cook for 1 minute or until it goes from being cloudy to being clear. Let the cooked berries cool for 1 minute, and then strain them over the berries in the bowl.


Toss the berries with the cooked mixture until everything is well coated.  Set aside at room temperature for 1-2 hours, stirring occasionally, or transfer to a covered storage container and refrigerate until ready to serve (we like the berries at room temperature but you can eat them at any temperature you like).


 When ready to assemble the blintzes, preheat the oven to 200 degrees if you've used pasteurized eggs and to 300 degrees if you've used regular eggs in the filling.  Take the wrappers and cheese out of the refrigerator.  Set one wrapper on a piece of parchment or work surface with the browned side up.  Place about 2-1/2 tablespoons of the filling  on the crepe, just downward of the center in a mound that is about 1-inch x 3-inches. 

Most instructions call for folding over the bottom edge first and then the sides, but I think they are easier to make if the sides are folded in first, and then the bottom.  If done this way the crepe will stick to itself and you won't be fighting with it trying to get the sides to stay in.


Fold the bottom part over the filling and then continue to roll the blint up into a cylinder.


Add 1 tablespoon butter to a large frying pan (I use cast iron), and heat until the pan is hot and the butter has started to brown.  Add half of the blintzes to the frying pan  and cook for a few minutes on each side until they are brown on both sides.
Drain the blintzes on paper towels and then put them on a pan and set in the warm oven.  Repeat with the remaining blintzes.  If you have used pasteurized eggs in the filling, they won't need more than 5 minutes in the oven to warm them up.  You don't want the filling too hot or the blintzes will be hard to eat.  If you have used regular eggs, you want the filling to reach 160 degrees.  This should take 10-15 minutes in the oven.  Let them cool down before you eat them, or the filling will be unpleasantly hot.

Serve the warm blintzes with a bowl of sour cream and the berries.

**You can use any mix of berries that you like, but don't mash raspberries unless you are fond of the seeds.  Even if you strain them, lots of the raspbery seeds will get into the sauce (to strain raspberries you need a fine mesh strainer, a food mill or a chinois).  If you are using only blackberries, you can skip the heating process. Just mash 1/3 of the berries, add back into the  remaining sugared berries and let them macerate for 1-2 hours or overnight.

Enjoy the berry sauce on pancakes, waffles, blintzes, cottage cheese or ice cream.

Saturday, December 25, 2010

Mushroom Barley Soup


I love soup  because it's so easy to make, doesn't really need fussing, measuring or gussying up - in other words, just the opposite of baking.  Especially when I've put all of my energy into making dessert and making it pretty, soup is just so easy!  And nothing is better on a cold winter evening, than a nice bowl of hearty soup.  My Dad, who loved to eat, didn't start cooking until later in life, after he and my mother both retired.  He, too was a great lover of soup.  This recipe is basically his with just a few minor changes and a fleshing out of the techniques.  He used equal portions of dried and fresh mushrooms, but I don't usually keep dried mushrooms around, and they can be hard to find.  I find that the cremini mushrooms are so tasty that the dried ones are not needed.  If you do decide to use some dried mushrooms, soak them in hot water, drain them reserving the liquid and then strain the liquid into the soup

Serves 6

1 tablespoon mild oil, divided
3/4 cup cremini mushrooms, washed, dried and chopped
1/4 Vidalia onion, skin removed, and chopped into 1/4-inch pieces
1 celery stalk, diced
2 carrots, peeled and diced
4 cups low-sodium chicken stock
4 cups low-sodium beef stock
1/2 cup pearl barley
1 cup non-fat half & half
salt and pepper to taste

Add the 2 teaspoons oil to a large stockpot.  Heat on high, and when the oil is hot, add the mushrooms, and saute until brown.


Reduce the heat, add the remaining oil, onions, celery and carrots, and cook for about 5 minutes, until the onions are translucent but not brown.  Add the stock and the barley.  Cover the pot and simmer for 1-1/2 hours.


You can leave the soup as it is, but I like to puree a few ladlefuls , which makes the texture more pleasant to me, and also thickens the soup.  I use a slotted spoon to transfer about a cup or two of veggies and barley to the processor, and then I process it until it is not quite smooth.  After it is ground up pretty well, you can add a little of the broth to help get it pureed.  Once it has the texture you like, scrape it back into the soup.  Stir in the half & half, bring back to a simmer, and serve.  Soup almost always thickens overnight.  If you want it more liquidy when you reheat it, add more half & half or puree some more of the veggies.

Saturday, December 18, 2010

HAPPY HOLIDAYS!!

Friday, November 26, 2010

Cranberry Pear Tart or Gratin

So, it's the day after Thanksgiving, and I had posted this recipe beforehand, showing the gratin but not the tart, which I planned on making for Thanksgiving.  I did go ahead and make this as a tart, which you can see came out beautiful!  And so tasty - everyone loved it.  As per my original assessment, I did add a little thickener so it would work better in the tart, but I also found that I didn't use all of the streusel, so I've adjusted the amounts below, and I didn't use all of the filling.  I'm not changing the filling, though, because you need that amount of liquid  to cook all of the pears.  Just save the extra as cranberrysauce, and that will be delicious, too.

Whether you make it as a tart or a gratin, the flavor is intense, but not as bitter as many cranberry desserts.  It seems to be adored by both those who love cranberries and those who usually don't like them, so give it a try!

For the crust   you can use either the Press-In SablĂ© Crust, weighted and partially baked, or you can use Sweet Pastry Crust, which is a more traditional tart crust recipe.  For this crust, roll the dough into a 13-inch round, about 1/16-inch thick. Transfer the dough to the tart pan, pressing it snugly into the bottom of the pan where it meets the edges and into the flutes of the tart pan. Roll a rolling pin over the top of the pan to cut off the excess dough. Press up on the edges to thin them out and to raise the edges about 1/16-inch (for a photo description, see Pies and Tarts Part 3. ) Refrigerate or freeze the crust for at least 15 minutes or up to 3 weeks (for long storage, place the tart in a jumbo zip-top bag).  For either crust, preheat the oven to 375 degrees F. Press a piece of greased aluminum foil snugly on top of the dough. Fill the foil with pie weights or dried beans. Bake for 15 minutes, remove the foil and beans and bake 5 minutes more, just  until the bottom crust is cooked but not brown. Set aside to cool completely.

Cranberry Pear Filling
3 cups fresh cranberries ( about 1 package)
3/4 cup sugar
2 McIntosh apples, peeled,halved and cored
3-4 firm pears, peeled and cored, cut into 1/2-inch dice and tossed with 1 teaspoon lemon juice (using 4 pears will give a little more "tooth" to the filing)
1/2 cup brown sugar
1/2 cup fresh orange juice
1/4 cup golden raisins
1 teaspoon cinnamon
Water, as needed

1 teaspoon tapioca starch or cornstarch
2 teaspoons cold water

Streusel (Crumbs)
1/2 cup all-purpose flour, fluffed, scooped and levelled into measuring cups
1/4 cup brown sugar
1/4 teaspoon cinnamon
3 tablespoons unsalted butter, melted

Wash the cranberries and remove any soft or rotten berries. Measure out 3 cups and place in a saucepan with the sugar. Place the apples in a food processor and process as finely as possible. Add to the pot. Cook over medium-low heat until the berries release their juices, about 8 minutes. Add the pears, brown sugar, orange juice, raisins and cinnamon to the pot. Increase the heat to medium and cook, stirring occasionally, until the mixture thickens and the pears are cooked, through but still firm, about 10-20 minutes, checking every 5 minutes to make sure there is enough liquid in the pot. If the mixture does not seem to be saucy enough, add water, 1/4 cup at a time, until the mixture seems thin enough for the pears to cook and for the mixture not to scorch. ( If your pears were very hard to begin with, they will take the longer amount of time to cook). During the last minute of cooking, place the starch in a small bowl and gradually add the 2 teaspoons of water to the starch. Stir this into the cranberry mixture and boil for about 1 minute. Transfer the mixture to a bowl to cool, and then refrigerate until ready to use (can be made ahead).

For the Tart:
Preheat the oven to 375 degrees F.  For the streusel, combine the flour, sugar and cinnamon in a small bowl. Add the butter and mix with your fingers to distribute the fat. Squeeze the mixture into crumbs.  Fill the tart with the cranberry filling.

Top with the streusel, and bake at 375 degrees F. until the crumbs are browned, about 15-25 minutes. Let the tart cool at least 30 minutes before serving. The tart can be made 8 hours ahead and stored, uncovered, or loosely covered, at room temperature.

VARIATION - Cranberry Pear Gratins


For 8 gratins, you probably need half of the filling and a full recipe of the Streusel.
To make gratins, leave the thickener (tapioca or cornstarch) out of the filling.  Place about 1/2 cup filling in each of 8 mini-gratin molds (you can also use ramekins, but you get more topping with the gratin molds which are shallow and long).  Sprinkle the crumbs over the gratins and set in the oven for 15-25 minutes, just until the crumbs are nicely browned.  Let the crisps cool for at least 30 minutes before serving.  


Saturday, November 6, 2010

Pecan and Pistachio Chocolate Chip Fingers


I almost always have cookies in my freezer for emergencies, but I had just gotten back from vacation and found out that I was the only one making dessert for a fundraiser celebration that I recently attended. I had frozen a cake beforemy trip, but didn't have time to make anything else, and my freezer was totally void of cookies. The party was at 7 and it was about 4 when I got this news. I wanted t make a simple dessert but didn't want to make brownies or chocolate chip cookies, both of which could have been done in the time allotted. Most of my cookies need chilling time, so I knew they were out, but I do have a lovely Heath bits cookie in my book, and I thought that would be perfect. The only problem was that I didn't have time to shop for Heath bits and didn't have them in my cupboard. What I did have in my freezer, however, was a small bag of left over baklava filling. I thought this might make a very interesting variation on my original recipe, and I wasn't disappointed. The cookies were crispy, buttery and had an unusual flavor due to the pistachios in the recipe.
2-1/2 sticks butter (10 ounces), room temperature
1 cup + 2 tablespoons sugar

2 large egg yolks, room temperature
3 cups (390 grams) unbleached all purpose flour, fluffed, scooped and leveled
1 teaspoon vanilla
1 cup mixed nuts, chopped finely by hand or in processor
1/2 cup mini-chocolate chips

1/2 teaspoon cinnamon

1/4 cup Ghirardelli Sweet Ground Chocolate and Cocoa, for dusting
OR
Decorating Glaze
1/4 cup (2 ounces) mini-chocolate chips
1 teaspoon oil
Preheat the oven to 350 degrees F. with shelves in the upper and lower thirds of the oven. Line 2 cookie sheets with parchment paper.

In a mixing bowl, beat the butter and sugar, just until blended. Beat in the vanilla and egg yolks, one at a time until well blended. Beat in the flour, a cup at a time (If you don't have a heavy-duty stand mixer, stir in the flour by hand.).  Stir together the nuts, choclate chips and cinnamon.  Stir this into the dough.

Shaping the cookies:
1. Use your hand to measure the ball size to about 1 inch.

2. Roll the ball in your palms in a circular motion to make it round and smooth.
3. Roll the ball into a log-shape by moving your hands back forth, parallel to each other.


4. Use your palm size to measure the length of the cookie to about 2-1/2-inches long. They will double in width, so go for a thinner, longer shape.
Transfer the cookies to the prepared cookie sheets, leaving about 2-inches between cookies.

Place the cookie sheets on the two shelves of the oven and bake for a total of 12-14 minutes, switching the pans from top to bottom, etc. after half of the cooking time.

Remove the cookie sheets and slide the parchment onto cooling racks to let the cookies cool for 5 minutes. Reduce the oven temperature to 275 degrees. When the temperature has come down, slide the parchment paper back on the cookie sheets and bake the cookies for another 10 minutes. Remove and cool, as above for about 5 minutes.

While the cookies are slightly warm, put the ground chocolate/cocoa into a strainer or sugar-shaker, and dust the tops of the cookies with the chocolate mixture.  Let the cookies cool completely before eating.

If you'd like to decorate them as shown in the opening photo, place the chocolate chips and oil in a small microwave-safe container. Micro-cook on medium power (5) for 1 minute. Stir until the chocolate is completely melted.

For this amount of glaze, you'll need a very small piping bag. You can make one out of a plastic storage or zip-top bag. Cut the bag in half, horizontally.
Put the bag into a small glass, and then fill the bag.


Hold the bag closed at the top, with the filled part resting in your palm, and your thumb and index finger holding the top (you can put a rubber band around the top if it is easier). Gently squeeze the filling toward the tip.


Make a very tiny cut in the tip with scissors. Pipe on the decoration.


These cookies keep for several days at room temperature, in a covered container. They may also be frozen in a covered container, with waxed paper between layers. This way you'll be able to defrost each cookie individually. They’ll keep frozen for 3 months. Defrost them at room temperature, uncovered.

Monday, October 25, 2010

Spiced Squash and Pear Soup


Here's my ultimate fall and winter comfort food.  And it's low-fat, high fiber and very easy to make - you can't say that about too many comfort foods!  For the soup pictured here, I actually used squash and about 1 cup of leftover canned pumpkin.  That's the great thing about it - you can vary the vegetables, the spices and the stock.  So whatever, your preferences are, jump in and make it the way you like it!

1 tablespoon olive oil
5-6 cups (about 2-3 pounds) peeled and seeded butternut squash chunks (or carrots or pumpkin)
1 pear, peeled, cored and cut into 1/2 inch chunks
1/4 sweet onion, peeled and chopped (optional and to taste)
1 teaspoon fresh ginger, finely chopped
1 teaspoon dried thyme
1/4 teaspoon nutmeg
1 teaspoon curry powder
1 tablespoon fresh ginger, peeled and grated
1 teaspoon of Kabsa spice, optional ( if no Kabsa spice is availabe, add a pinch of cardamom, cinnamon, cumin and fennel - to equal 1 teaspoon)
5 cups low-salt chicken stock
fresh thyme stalks, for garnish

Place the oil in a large stockpot.  Add all o f the chopped vegetables, fruit and spices - except the ginger,  to the pot.  Turn the veggies in the oil so that everything is coated. Cook over medium heat for 5 minutes to lightly glaze the vegetables.
Add the ginger, and cook for another 2 minutes.  In case  you've never used fresh ginger before, it's an ugly brown tuber that you find in the produce isle.  It doesn't keep very long, so I buy a knob, use what I need and then peel and chop the remainder and throw it into a jar full of dry Sherry.  It will keep for months like that.

Add the stock.  It should just about cover the vegetables.  If there isn't enough, you can add water or more stock.  Bring the stock to a simmer, cover the pot and cook for about 1 hour until the vegtables are
soft enough to mash completely.
 
 To puree the soup, use an immersible blender.  Blend completely smooth, or leave some chunks, however you prefer.


Alternatively, the vegetables can be transferred to a food process and processed until smooth.  Process first to a rough chop, and then add a little stock, if necessary, to blend the vegetables to your desired preference.
 Stir the blended vegetables back into the pot.  At this point the soup will be a little thin.

Simmer it, uncovered, for about 10 minutes to thicken it up. If you plan to eat it immediately, you can continue to simmer it to the desired thickness. If making the soup ahead, don't over-thicken it, because it will dramatically thicken as it cools, and will stay thicker even after it gets reheated.


To serve, ladle the soup into bowls and garnish with the fresh thyme.