The story and more how-to photos will be coming later this weekend. Congratulations Roberta and Phil!
Showing posts with label cake. Show all posts
Saturday, May 12, 2012
Monday, January 10, 2011
Filled Chocolate Cupcakes - The recipes - revised January 2011
This is an update to this recipe which was put up in September. I was making them again recently (January '11), and realized that there was an error in the ingredient section (probably, because as you can tell from the following text and photo, I had trouble reading my soiled recipe copy). The gram weight of flour was correct, but the corresponding cup measurements were not. If you have printed out this recipe, please check the updated ingredients.
In addition to this, if you read the prior post, you might have noticed that I wasn't happy with how tender the cupcakes were. This time around, I did some more experimenting and found that using bread flour instead of all-purpose made for a sturdier cupcake, and, I added another egg. This made the cupcakes firmer, also helped them rise higher and allowed me to get the cupcakes out of the liners more easily.
The following is the original post, with the appropriate corrections made to the ingredients.
----------------
I've been trying to get this post done since the summer, but I had to grab a few minutes late at night to write up my recipes, because the days were filled with BCC Rally auction stuff. Now that the auction is over, I finally have time to post. But when I go back to see what I've done, I can hardly read the recipe because it's covered in chocolate! That's why you need a CD-rom cookbook (mine, of course). Because instead of having a cookbook that's covered in chocolate, you can have a few recipe pages that you've printed off, and when you're done, you toss the messy things out! But now, on to the recipe!
The Cake
The first time I made the cupcakes with Veronica and Jasmine (see Filled Chocolate Cupcakes, Part 1, I used a light version of my Chocolate Layer Cake. They were delicious, but a bit too tender. I think they were so tender because we used the maximum amount of milk (3/4 cup) and because we mixed them by hand. When I made them again, I used just a bit more than the minimum, and they came out much better - a little denser, which held up better for a pick-up type cake.
Makes 42 mini-cupcakes or 12 regular cupcakes
2-1/2 ounces semisweet chocolate, chopped
1 tablespoon oil
1 cup minus 1-1/2 TB (122 grams) bread flour, measured by fluffing, scooping and levelling*
2 tablespoons unsweetened cocoa powder
3/4 teaspoons baking soda
1/8 teaspoon salt
5 tablespoons (2.5 ounces) unsalted butter, cut into tablespoons and at room temperature
1/4 cup light brown sugar
1/2 cup sugar
1/2 teaspoon vanilla
2 large eggs, room temperature
1/4 cup + 2 tablespoons sour cream, room temperature
1/3 cup cup milk (skim or regular), room temperature
Preheat the oven to 350 degrees F. with an oven rack in the middle of the oven. Line muffin pans with liners.
You can see that they sort of pop up and don't stay down in the cups. Just give them a good shove from above, and let the sides pleat. When you add the batter, they will stay down.
Place the chopped chocolate and the oil in a microwave-safe container. Micro-cook on medium (#5) for 1 minute. Stir and then reheat in 15-second increments on medium power until the chocolate is melted.
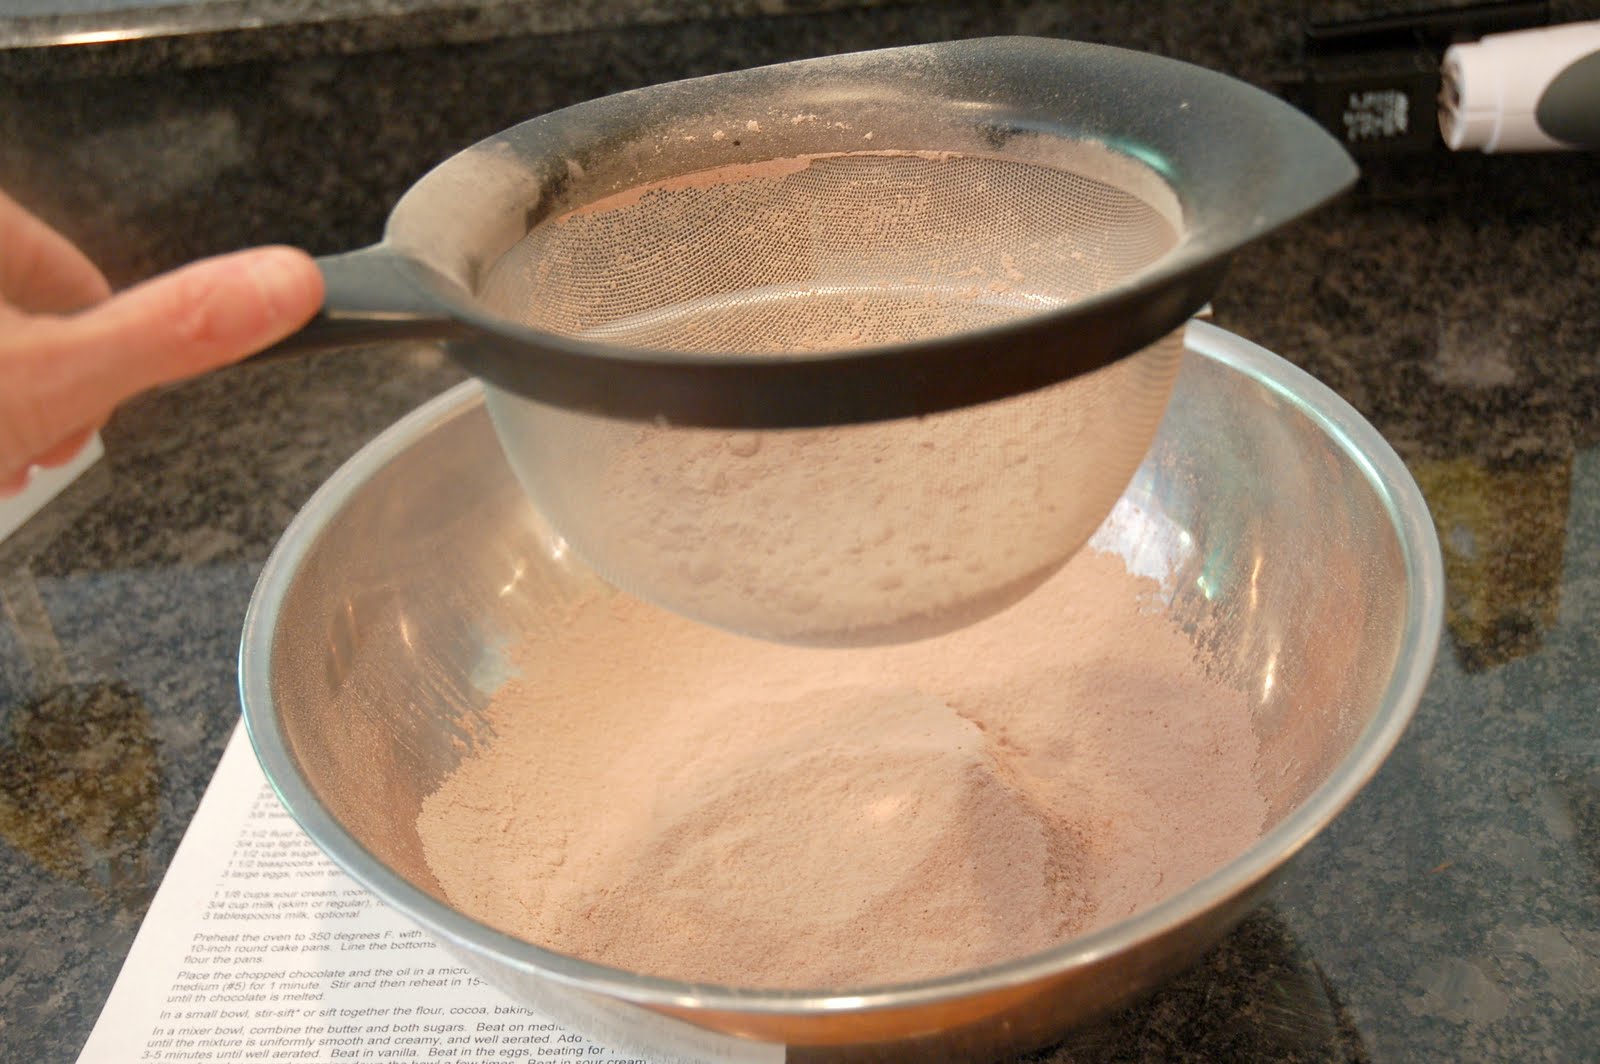
In a small bowl sift together the flour, cocoa, baking soda and salt. Set it aside.
In a mixer bowl, combine the butter and both sugars. Beat on medium speed for 3-5 minutes until the mixture is uniformly smooth and creamy, and well aerated. Beat in vanilla. Add the eggs, beating for 1 minute after the addition of each egg, and scraping down the bowl a few times.
On low, beat in the sour cream and chocolate. On low, in 4 additions, beat in the flour mixture alternately with the milk, starting and ending with the flour. (This is actually easier to do by hand, because the batter doesn't tend to separate when you do it by hand, but it does make the cake more tender when done by hand).
Spoon the batter into the muffin cups, using one spoon to scoop up the batter and the other to push the batter into the pans. Fill the cups 1/2 to 3/4 full.
The Filling
I used whipped cream to fill the cherry-topped cupcakes, and Simple Vanilla Buttercream for the ones that look like Hostess cupcakes. The cream was easier to make, but the buttercream tasted far better. I've been making my buttercream a little thicker and sweeter lately, by adding a little powdered sugar to my basic recipe, but for this I wanted a filling that was very creamy - again so that it would be reminiscent of Hostess cupcakes. To do this, I used less than half of the powdered sugar as usual.
It’s ultra important that the butter be at the right temperature for this recipe to work, AND THE ROOM! If the room is too hot, the buttercream will never form. The room should be no warmer than 74 degrees - and colder is even better.
To get the butter the right temperature, cut it into tablespoons and let it stand on a cutting board until barely soft. Using your thumb, push down on each pat to flatten it into the board (it will still be very firm, and will split when you press down on it). In 3-5 minutes the butter should be ready. If you press down on it with your thumb, it should yield readily, but should not be soft and melty. If the butter is a little firm, it can always be beaten a little bit more, but if too soft, you’ll have to refrigerate it, and start over. I always aim for a little bit harder, rather than too soft.
2-1/2 sticks (20 tablespoons) unsalted butter, at cool room temperature
1 pound jar Marshmallow Fluff (this is a natural product containing only eggs, corn syrup and flavoring - so don't use another brand unless you check the ingredients)
1 teaspoon vanilla extract
2-3 tablespoons sifted powdered sugar
1-2 tablespoons corn syrup, to taste
2-3 tablespoons milk to soften the buttercream, optional
Now that the butter is at the proper temperature, scrape the butter into a mixing bowl and beat it until creamy (1 or 2 minutes.) Scrape down the bowl. Beat in the powdered sugar until fluffy. Add half of the Fluff, and beat on medium high until blended. Add the remaining Fluff, and continue to beat, on medium-high, for 2-5 minutes or until the frosting is fluffy and light and no longer marshmallowy.
This is what it should look like.
If the buttercream, does not form after beating for 5 minutes, place it in the refrigerator for 10 minutes, and then try and beat it again. After the buttercream forms, beat in the vanilla, corn syrup and milk, to taste.
If you put a coupler in the pastry bag before filling it, you'll be able to try tips to find the one that works best with the size cupcake you are making. The piece on the left goes into the pastry bag, and then the tip gets put on, and the nut, in the center, keeps the pastry tip tight.Choose the tip that fits the size of the cupcake (I used Magic Tip #8 for filling, and Wilton #21 star for filling)
Stick the tip into the bottom or top of the cupcake, depending on how you finish them (if you plan to add chocolate icing instead of having the frosting come out of the top, fill from the bottom, otherwise you will see the dimple where the frosting went in. It's easier to fill them from the top. For one thing, you don't have to take them out of the wrappers, which give some support to the cupcake so it doesn't split as you fill it. You can also feel when the cupcake is filled with the buttercream, and can stop before the cupcake starts to split.

You can see they look great with nothing more than some frosting coming out the top. But they're also fantastic, and look like mini Hostess cupcakes if you frost them with chocolate icing and vanilla icing decoration.
Chocolate Icing
My notes didn't say if the following recipe is the right amount to frost all of the cupcakes (sorry - I either post it now, or you have to wait another year until I make them again!)
3/4 cup whipping cream
8 ounces semisweet chocolate, chopped
2 cups powdered sugar
2 tablespoons hot water
Heat the cream in a small microwave-safe bowl for 30 seconds. Stir in the chocolate. Let it stand for a minute and then stir. If the chocolate isn't completely melted, heat in 10-second increments on power 5, stirring between each, until the chocolate melts completely and the mixture can be stirred into a smooth glaze.
Sift the powdered sugar into a small bowl. Stir the chocolate into the powdered sugar. Stir in half of the hot water. The mixture should be thin enough to fall off of the spoon in a steady stream. If it isn't, add the remaining hot water, 1/2 teaspoon at a time.
Dip the cupcakes into the glaze. Turn the cupcakes right side up and let the glaze firm up a little.
In the photo below you can see that I filled the cupcakes from the top, and I wasn't able to get the top level, so that the chocolate dips down in the center. You can add a decorative design, as I have here, to cover the dip, or you can add the vanilla glaze
Vanilla Glaze
1 cup powdered sugar
1/2 teaspoon vanilla
2 tablespoons whipping cream
Sift the powdered sugar into a mixer bowl. Whisk in the vanilla and the cream. The glaze should be thick enough to pipe. Add a little more sugar or cream, if necessary to get the proper texture.
For this amount of glaze, you'll need a very small piping bag. You can make one out of a plastic storage or zip-top bag. Cut the bag in half, horizontally.
Put the bag into a small glass, and then fill the bag
Hold the bag closed at the top, with the filled part resting in your palm, and your thumb and index finger holding the top (you can put a rubber band around the top if it is easier). Gently squeeze the filling toward the tip. Make a very tiny cut in the tip with scissors. Pipe on the decoration, and then refrigerate until 30 minutes before serving.
Monday, August 2, 2010
Filled Chocolate Cupcakes.\, Part 1
I would say that the morning was not a success, although we did have fun and learned what to do when you have a failure. The first problem was that the cupcakes (we made minis and regular) stuck to the pans. We hand anticipated some trouble and had greased and floured some of the cups, and just greased the others, but ALL of the cupcakes stuck.
But the cake tasted great - so we certainly didn't want to throw it away. Now was the chance to think creatively. Veronica thought the cupcake remnants looked like muffin tops (they did) and in keeping with our idea of having filled cupcakes, we decided to cut off the tops and sandwich two together with frosting and filling inbetween. Here are my two helpers, Jasmine and Veronica.
I had planned on using simple meringue buttercream and cherries for the filling, but Jasmine wanted to know if I could make some ganache, so we made some of that, too. The buttercream never really firmed up the way I had hoped (the kitchen was WAY too warm), so eating the cakes right away (no refrigeration) was perfect with the soft buttercream, cherries, chocolate cake and oozy ganache (like hot fudge!).

Next post, look for the recipes for chocolate cupcakes, frosting and icing that works!
Labels:
blog entries,
cake,
chocolate
Wednesday, April 7, 2010
Tiramisu
For those of you who read the post on Passover Tiramisu, I mentioned that I was going to try using whipped cream cheese. I also got the bright idea that a quick version might be had using packaged Passover mandel bread. The whipped cream cheese did work, and I have added that to the Passover Tiramisu post. The mandel bread variation, however was quite awful! Oh well, it was a try.
For those of you who have never had Tiramisu, it is a layered dessert, combining soaked cake with a cheesy, custardy filling. It’s usually made in a large pan and then cut into serving pieces, but it can also be served in shot glasses, custard cups or champagne flutes. It can vary in texture and flavor, at the whim of the chef. Some like the filling light, and some prefer a more dense, cheesy filling. It’s usually flavored with coffee, Marsala or brandy, and chocolate, but here too, there is a lot of room for individuality. My Tiramisu is a light version and I flavor it mostly with coffee, with just hints of Marsala and chocolate. Because there is so much room for personal preference in this recipe, I’ve notated where ingredients can be altered.
Just a word about mascarpone - it can vary dramatically depending on the brand and price point. I recently bought some at Trader Joe's for about $3.00/8 ounces, and some at my local supermarket for about $8.00. The less expensive was much yellower and had a slightly gritty mouthfeel. It also curdled when I beat it. I have since stopped beating the mascarpone and stir it instead. The more expensive mascarpone had a much nicer flavor and a very smooth and creamy texture.
Serves 6
1 small package savoiardi (Italian ladyfingers – you’ll need 16-24 ladyfingers)
OR
Homemade savoiardi, recipe follows
Filling
8 ounces mascarpone
4 large egg yolks
1/2 cup sugar
2 tablespoons sweet Marsala or brandy, optional
3/4 cup whipping cream (or 6 eggs whites, stiffly beaten with powdered sugar)
1/4 cup powdered sugar
Soaking Syrup
1-1/2 cup brewed coffee -- hot
1/4 cup sugar (or less, to taste)
1/4 cup sweet Marsala wine, Godiva, Kahlua or Rum
Topping
2 ounces finely grated nondairy semisweet chocolate, cocoa, or a combination of the two (or more to taste)
For the filling:
Place the eggs (in the shell) into a bowl of hot water. Let stand for 5-10 minutes (you are heating the eggs just to get more volume out of them). Remove the mascarpone from the refrigerator and spoon it into a large mixing bowl. Set it aside to warm up.
Crack the eggs, save or discard the whites and transfer the yolks to a large mixer bowl. Beat for a minute to blend, and then beat in the sugar. Continue to beat until the eggs are pale and thickened, about 3-5 minutes. Beat in the alcohol, if using it.
Stir the mascarpone to loosen it slightly. Stir 1 cup of the egg mixture into the mascarpone. Fold in the remainder of the egg mixture.
Place the whipping cream in a small bowl. Stir in the powdered sugar. Beat on high speed until the mixture forms firm peaks. Fold the whipping cream into the egg mixture.
To assemble the tiramisu, dip one ladyfinger at a time into the syrup, turning it in the syrup for about 10 seconds, until it softens but isn’t soft throughout. Place each, flat side up, in an 8 or 9-inch square pan, until the whole bottom is covered.
OTHER PRESENTATIONS
Individual tiramisu can be made in shot glasses, custard cups or champagne glasses. Make several layers as directed above, but add grated chocolate on top of each layer of filling. It will show through the glass and delineate the layers.
Savoiardi (Ladyfingers)
3/4 cup (75 grams) sifted cake flour
1/4 teaspoon salt
1 teaspoon vanilla extract, optional
1/4 cup AND 1/3 cup sugar -- divided
3 large eggs -- separated
1/4 teaspoon cream of tartar
Preheat the oven to 400 degrees F. with racks in the upper and lower thirds of the oven (if you have a convection oven set the temperature to 375 degrees F.). If you have trouble visualizing size, draw the size of the ladyfinger on the curled side of a piece of parchment. 3-1/2-inches long by 1-1/4 inches wide is a good size (to simplify, make the width the same width as your ruler so you don’t actually have to measure. You can also eyeball the size, if you are good at that).
Turn the parchment over, so that when you start piping, you will not be piping onto the side you have drawn on. Set the parchment on greased baking sheets (the grease keeps the parchment anchored so it doesn't go flying when you move the sheet).
In a small bowl, mix together the flour and salt. Set aside. Place the egg yolks in a large mixing bowl. Beat on medium speed, adding ½ cup of sugar gradually. When all of the sugar has been added, increase the speed to high, and beat until the egg yolks are thick, fluffy and pale in color, about 5 minutes.
Beat in the vanilla, if using. Sift the flour mixture into the egg yolks, but do not mix together.
Transfer the eggs whites to a large, clean, grease-free mixing bowl. Add the cream of tartar to the egg whites, and then, using clean, grease-free beaters, beat the eggs whites until very foamy throughout. Gradually add the remaining 1/3 cup of sugar, and beat the whites just until they form stiff peaks. Do not overbeat or they will be hard to blend into the batter. Fold 1/3 of the whites into the batter. Fold in the remaining egg whites.
For those of you who have never had Tiramisu, it is a layered dessert, combining soaked cake with a cheesy, custardy filling. It’s usually made in a large pan and then cut into serving pieces, but it can also be served in shot glasses, custard cups or champagne flutes. It can vary in texture and flavor, at the whim of the chef. Some like the filling light, and some prefer a more dense, cheesy filling. It’s usually flavored with coffee, Marsala or brandy, and chocolate, but here too, there is a lot of room for individuality. My Tiramisu is a light version and I flavor it mostly with coffee, with just hints of Marsala and chocolate. Because there is so much room for personal preference in this recipe, I’ve notated where ingredients can be altered.
Just a word about mascarpone - it can vary dramatically depending on the brand and price point. I recently bought some at Trader Joe's for about $3.00/8 ounces, and some at my local supermarket for about $8.00. The less expensive was much yellower and had a slightly gritty mouthfeel. It also curdled when I beat it. I have since stopped beating the mascarpone and stir it instead. The more expensive mascarpone had a much nicer flavor and a very smooth and creamy texture.
Serves 6
1 small package savoiardi (Italian ladyfingers – you’ll need 16-24 ladyfingers)
OR
Homemade savoiardi, recipe follows
Filling
8 ounces mascarpone
4 large egg yolks
1/2 cup sugar
2 tablespoons sweet Marsala or brandy, optional
3/4 cup whipping cream (or 6 eggs whites, stiffly beaten with powdered sugar)
1/4 cup powdered sugar
Soaking Syrup
1-1/2 cup brewed coffee -- hot
1/4 cup sugar (or less, to taste)
1/4 cup sweet Marsala wine, Godiva, Kahlua or Rum
Topping
2 ounces finely grated nondairy semisweet chocolate, cocoa, or a combination of the two (or more to taste)
For the filling:
Place the eggs (in the shell) into a bowl of hot water. Let stand for 5-10 minutes (you are heating the eggs just to get more volume out of them). Remove the mascarpone from the refrigerator and spoon it into a large mixing bowl. Set it aside to warm up.
Crack the eggs, save or discard the whites and transfer the yolks to a large mixer bowl. Beat for a minute to blend, and then beat in the sugar. Continue to beat until the eggs are pale and thickened, about 3-5 minutes. Beat in the alcohol, if using it.
Stir the mascarpone to loosen it slightly. Stir 1 cup of the egg mixture into the mascarpone. Fold in the remainder of the egg mixture.
Place the whipping cream in a small bowl. Stir in the powdered sugar. Beat on high speed until the mixture forms firm peaks. Fold the whipping cream into the egg mixture.
For the syrup:
Combine the hot coffee, sugar and Marsala in a small bowl. Stir until the sugar dissolves.
To assemble the tiramisu, dip one ladyfinger at a time into the syrup, turning it in the syrup for about 10 seconds, until it softens but isn’t soft throughout. Place each, flat side up, in an 8 or 9-inch square pan, until the whole bottom is covered.
Spoon on half of the filling. Dip the remaining ladyfingers, as above, placing them on top of the filling. Spoon on the remaining filling. Cover the pan with foil. Refrigerate overnight. Before serving, sprinkle the top with grated chocolate, cocoa or a combination (adding in some ground coffee might be nice, too). The Tiramisu will be firm enough to cut into pieces, although the first piece will be hard to remove. Use a small square spatula to get the pieces out of the pan.
OTHER PRESENTATIONS
Individual tiramisu can be made in shot glasses, custard cups or champagne glasses. Make several layers as directed above, but add grated chocolate on top of each layer of filling. It will show through the glass and delineate the layers.
Savoiardi (Ladyfingers)
3/4 cup (75 grams) sifted cake flour
1/4 teaspoon salt
1 teaspoon vanilla extract, optional
1/4 cup AND 1/3 cup sugar -- divided
3 large eggs -- separated
1/4 teaspoon cream of tartar
Preheat the oven to 400 degrees F. with racks in the upper and lower thirds of the oven (if you have a convection oven set the temperature to 375 degrees F.). If you have trouble visualizing size, draw the size of the ladyfinger on the curled side of a piece of parchment. 3-1/2-inches long by 1-1/4 inches wide is a good size (to simplify, make the width the same width as your ruler so you don’t actually have to measure. You can also eyeball the size, if you are good at that).
Turn the parchment over, so that when you start piping, you will not be piping onto the side you have drawn on. Set the parchment on greased baking sheets (the grease keeps the parchment anchored so it doesn't go flying when you move the sheet).
In a small bowl, mix together the flour and salt. Set aside. Place the egg yolks in a large mixing bowl. Beat on medium speed, adding ½ cup of sugar gradually. When all of the sugar has been added, increase the speed to high, and beat until the egg yolks are thick, fluffy and pale in color, about 5 minutes.
Beat in the vanilla, if using. Sift the flour mixture into the egg yolks, but do not mix together.
Transfer the eggs whites to a large, clean, grease-free mixing bowl. Add the cream of tartar to the egg whites, and then, using clean, grease-free beaters, beat the eggs whites until very foamy throughout. Gradually add the remaining 1/3 cup of sugar, and beat the whites just until they form stiff peaks. Do not overbeat or they will be hard to blend into the batter. Fold 1/3 of the whites into the batter. Fold in the remaining egg whites.
Spoon the batter into a pastry bag with a ¾-inch round tip. Using the template you have drawn on the parchment paper, pipe ladyfingers leaving ½-inch between each ladyfinger.
Alternatively, you can spoon the batter onto the cookie sheets using a regular oblong soup spoon. These will be fatter than the ones that are piped, but that will be fine. It is okay if they join together as they bake. Place the cookie sheet(s) in the oven, and bake the fingers for 4 minutes. Switch the cookie sheets so the bottom one is now on the top, and bake another 4-6 minutes until the ladyfingers are golden brown (you won't need to switch sheets if using a convection oven).
Remove the sheets from the oven, and slide the parchment paper onto cooling racks. Remove the ladyfingers from the parchment paper before they cool completely. Let the ladyfingers stand, uncovered, for a few hours to dry out. If using the ladyfingers within a day or two, place the ladyfingers on a cookie sheet, flat side up, and bake them at 400 degrees F. until the flat side looks toasted and firm, about 5 minutes. Set aside to cool. For longer storage, freeze the untoasted ladyfingers for up to 3 months. Defrost before using them, and then toast them as above.
Thursday, February 11, 2010
Valentine's Day Layer Cake
A nice way to tell someone that you care about them is to make a heart shaped cake. Heart shaped cakes come in many different sizes to suit the occasion and number of people to be served. Having some amount of red on the cake is tradition for Valentine's so I like to use a reddish jam in both the filling and on top of the cake. In this cake, I used mixed berry preserves because it has less seeds than raspberry jam so I didn't need to strain it.
Yellow Cake Layers
2-1/8 cups (280 grams) all-purpose flour, measured by fluffing, scooping and leveling
2 1/4 teaspoons baking powder
1/2 teaspoon salt
13-1/2 tablespoons (6.5 ounces) unsalted butter, at cool room temperature
1-1/2 cups + 2 tablespoons sugar
1-1/2 teaspoons vanilla
3 large eggs, room temperature
1 large egg yolk, room temperature
2 tablespoons oil
3/4 cup + 2 tablespoons whole milk, room temperature.
Cassis Buttercream
4-1/2 sticks (25 ounces) unsalted butter
1-1/2 pounds Marshmallow Fluff®
2 teaspoons vanilla extract
1/2 cup powdered sugar, sifted
1/3 cup cassis liqueur
3 tablespoons corn syrup, or to taste
1 (10-ounce) jar mixed berry jam or preserves*
*I like to use mixed berry preserves because it has less seeds in it than raspberry, and does not need to be strained. Straining jam causes it to thin out quite a bit, so unstrained goes on in a thicker layer without dripping. Try to find jam that has fruit as the first ingredient and does not contain corn syrup. This will give you the freshest tasting jam or preserves.
For the cake:
Preheat the oven to 350 degrees F. with a rack in the middle of the oven. Spray-grease a 10-inch heart-shaped cake pan. Line the bottoms of the pan with parchment paper, spray-grease, and then flour the pan.
In a small bowl, sift together the flour, baking powder and salt.
Place the butter and sugar into a large mixer bowl, and beat for a full 5-7 minutes until fluffy. Beat in the vanilla. Beat in the eggs, one at a time, beating for 30 seconds after each addition. Scrape down the bowl and then beat for a minute to blend everything. Beat in the oil.
By hand, stir in 1/3 of the flour mixture into the batter. Stir in 1/2 of the milk. Repeat until all of the flour and milk has been added (if you want the cake to be a little more sturdy and less crumbly, you can do this in the mixer, but it’s harder to get all of the milk in without the batter curdling). The batter will be thick.
Spoon all but ½ cup of the batter into the pan and spread it evenly in the pan (use a toothpick to check the thickness at various places). Discard the extra batter.
Place the pan in the oven and bake for 40-50 minutes until a tester inserted into the middle of a cake comes out absolutely clean. The cake should be nicely browned and will deflate slightly when it is completely cooked.
Cool the pan on a rack and then run a knife around the perimeter to loosen the cake. Place a piece of waxed paper over the cake and then a rigid board, cardboard or pan. Holding everything together, flip the cake over. Rap the whole assembly sharply on the counter to loosen the cake, and then remove the pan.
Remove the parchment. Place a cakeboard onto the cake, and re-invert so that the cake is now right-side up and on its cakeboard . Let the cake cool completely. Using a cake saw or a serrated knife, cut off just a little of the top of the cake to make it level, and then slice the cake in half, horizontally to create two layers.
Slide a baking sheet or an extra large spatula under the top layer and remove it from the bottom. Place it in the freezer.
For the buttercream:
It’s ultra important that the butter be at the right temperature for this recipe to work. Cut the butter into tablespoons and let it stand on a cutting board until barely soft. Using your thumb, push down on each pat to flatten it into the board (it will still be very firm, and will split when you press down on it). In 3-5 minutes the butter should be ready. If you press down on it with your thumb, it should yield readily, but should not be soft and melty. If the butter is a little firm, it can always be beaten a little bit more, but if too soft, you’ll have to refrigerate it, and start over. I always aim for a little bit harder, rather than too soft.
Now that the butter is at the proper temperature, scrape the butter into a mixing bowl and beat it until creamy (1 or 2 minutes.) Scrape down the bowl. Beat in the powdered sugar until fluffy. Add half of the Fluff, and beat on medium high until blended. Add the remaining Fluff, and continue to beat, on medium-high, for 2-5 minutes or until the frosting is fluffy and light and no longer marshmallowy.
This is what it should look like.
If the buttercream, does not form after beating for 5 minutes, place it in the refrigerator for 10 minutes, and then try and beat it again. After the buttercream forms, beat in the vanilla. Beat in the cassis 1 tablespoon at a time. If the buttercream is not sweet enough, beat in the corn syrup, to taste. Remember that the cake will be layered with jam, which is quite sweet. You might want to take some of the cake that you cut off, of the cake, layer it with jam and buttercream and taste it, before adding any of the corn syrup.
Assembling the cake:
Spread half of the preserves over the bottom layer, leaving about 1/4 –inch around the perimeter of the cake without jam. Pipe a rim of buttercream to hold in the jam. (Here you can see that I didn't leave an edge and pipe a border, and the jam leaked out and onto the sides).
Spoon on a globs of buttercream and then spread these to form a solid layer, 1/4-inch to 1/2-inch, to taste. Be careful not to get the jam mixed up into the frosting.
Set the top layer on the cake. Spread frosting on the sides. If any jam has gotten into the frosting or if there are a lot of crumbs, you might want to put just a very thin layer of frosting on the cake and then refrigerate it for an hour to set the crumb coat of frosting.

If you do not need to write anything on the cake, it looks prettiest if the top jam shows through, so a nice diagonal design, as you see in the opening photo, looks great. If you need to write on the top of the cake, again spoon on some frosting and then spread it to cover the top. Write on the cake, and then do the final top border. To finish the cake, set it on the serving platter and pipe the bottom border (if you have a cake board that is bigger than the can, you can pipe the bottom border directly onto it. Refrigerate until ready to about 3 hours before serving and then let it stand at room temperature.
Store the cake in a cake container, in the refrigerator, for up to 4 days.
Labels:
cake,
Valentine's
Tuesday, December 29, 2009
Chocolate Dulce de Leche Cake
In my last post I made "Chocolate AlmondTriangles", and talked about making the cake in a more traditional round shape, and simplifying the frosting. That is just what I've done here (with a different flavoring for the frosting, as well). Buttercream is usually one of the hardest things to make, especially for novice bakers or those with modest equipment. Buttercream goes from the traditional method of trying to beat a hot sugar syrup into beaten egg whites, to beating the egg whites with the sugar, to using egg whites from a carton, and now to using Marshmallow Fluff instead of beating the egg whites from scratch. Instead of spending 20 -30 minutes to make one batch of buttercream, you can probably do it in 5-10 minutes, and it's just as delicious as the real thing. But even with this method, problems can arise, unless you follow the recipe carefully. Make sure that you use only Marshmallow Fluff, and not another brand, as MF has nothing artificial in it except for vanillin. Instead of doing a random design on the top of the cake ( mine looks like ghosts or wisemen, but I was really just playing), it would be easy to write "HAPPY NEW YEAR" or whatever else you might like to write. Please note that if you want to pipe on any decorations, you’ll need to make more buttercream, as you really just have enough to get the cake frosted.
This recipe can now be found on my CD-rom or download: Amazing Desserts - A Photographic Guide to Better Baking. For order information, please click on MY BOOKS, above.
Subscribe to:
Posts (Atom)